
How to Make LED Neon Signs.
How to make LED Neon signs with only a router and a bandsaw.
Easy Woodworking Project.
A quick a fun project that involves some freehand routing into plywood or MDF. Easy to make with just a bandsaw and a router. And here’s the thing, you don’t even need a router! Watch the video above to see how it’s done.
Supples


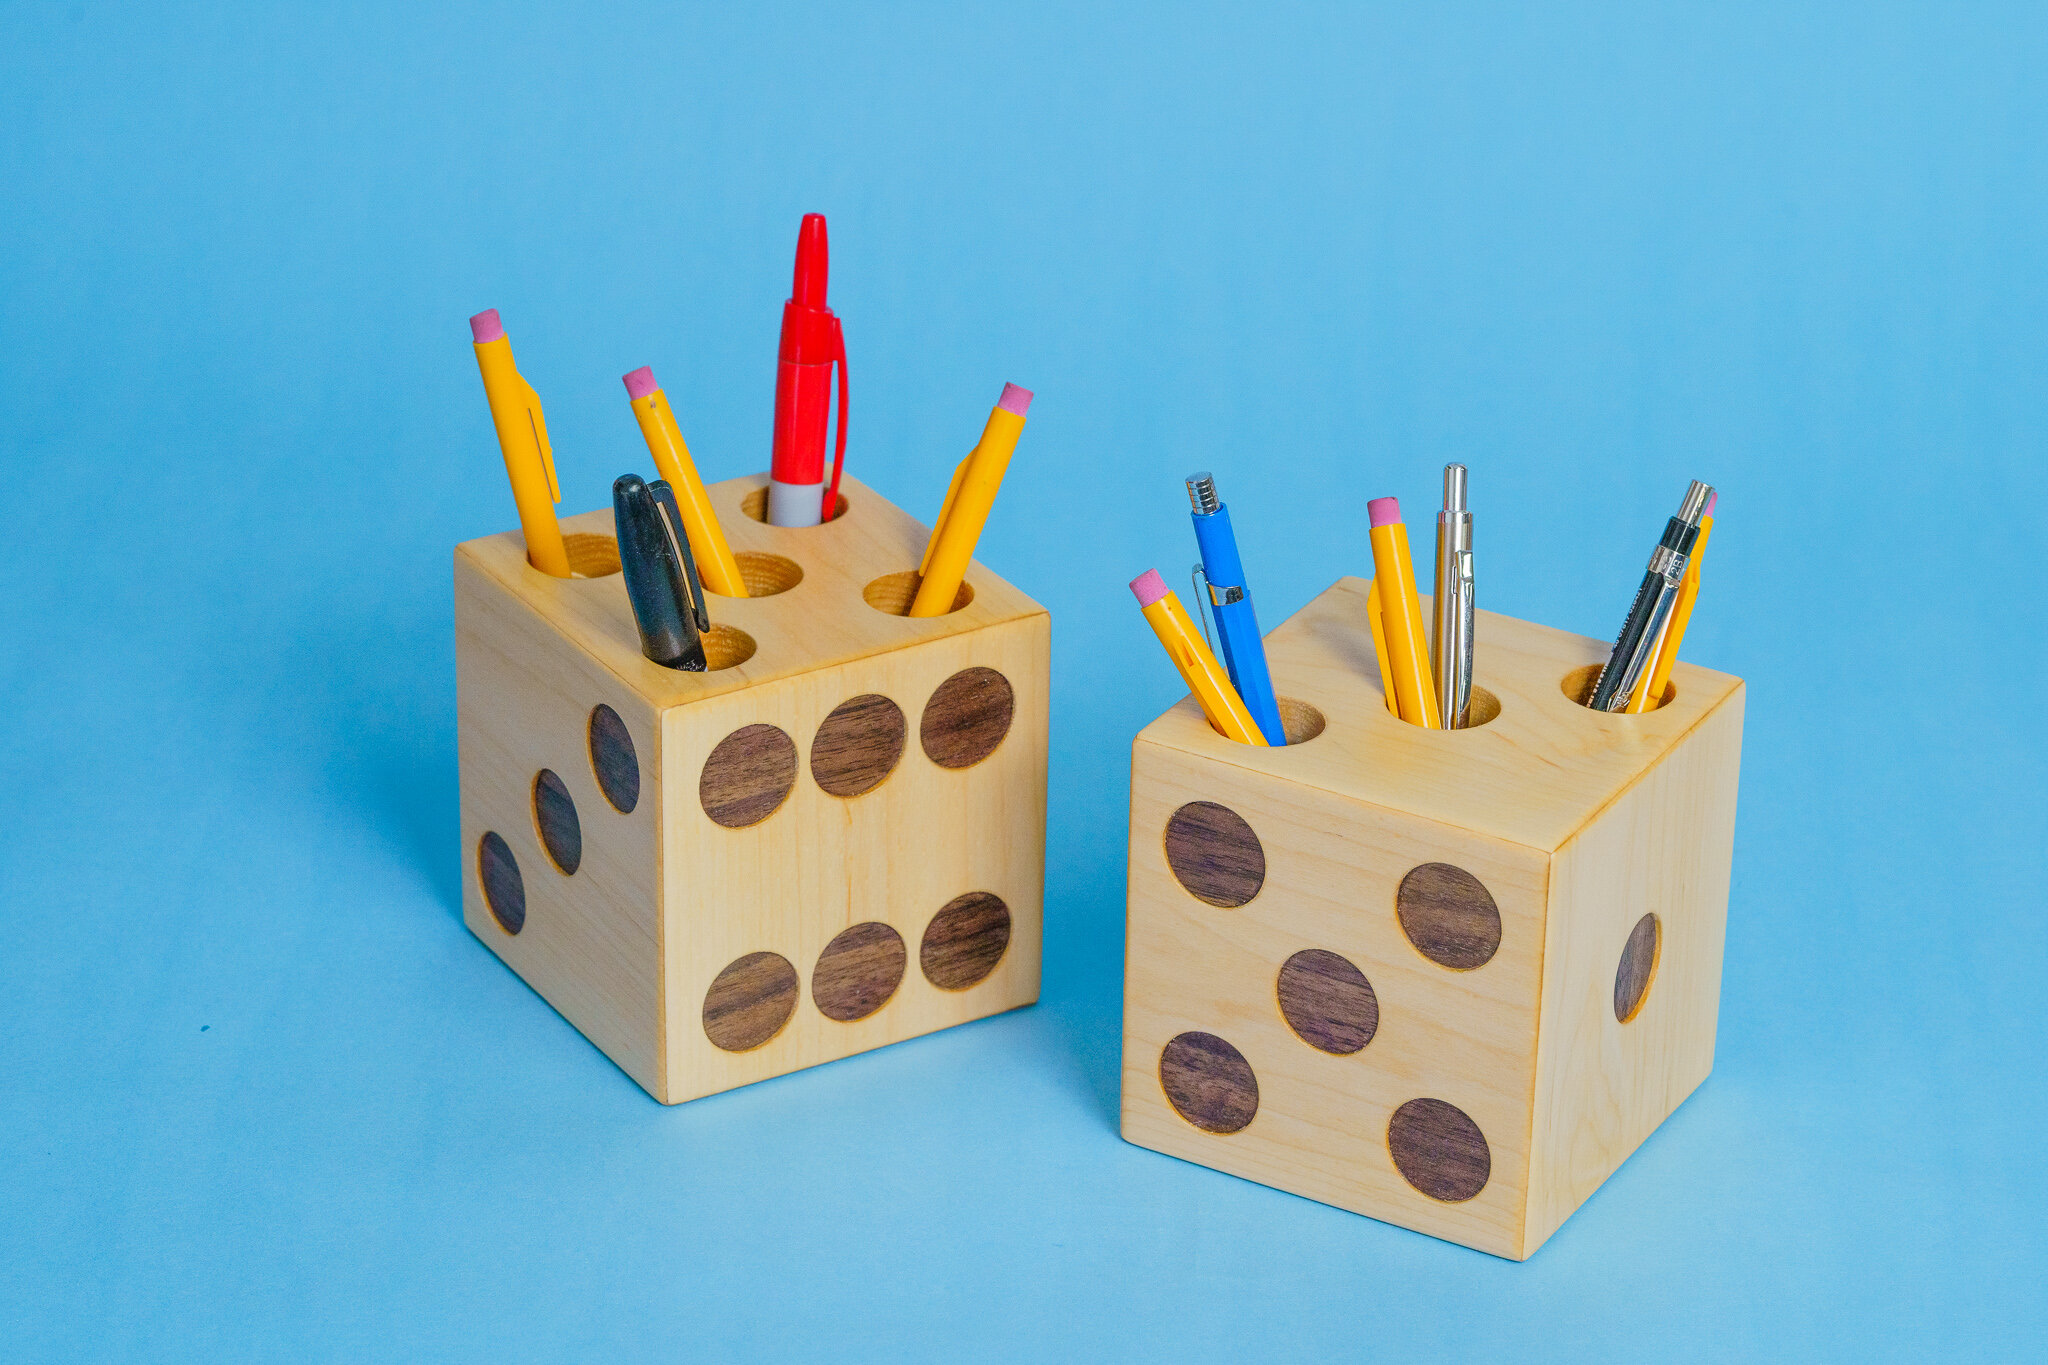
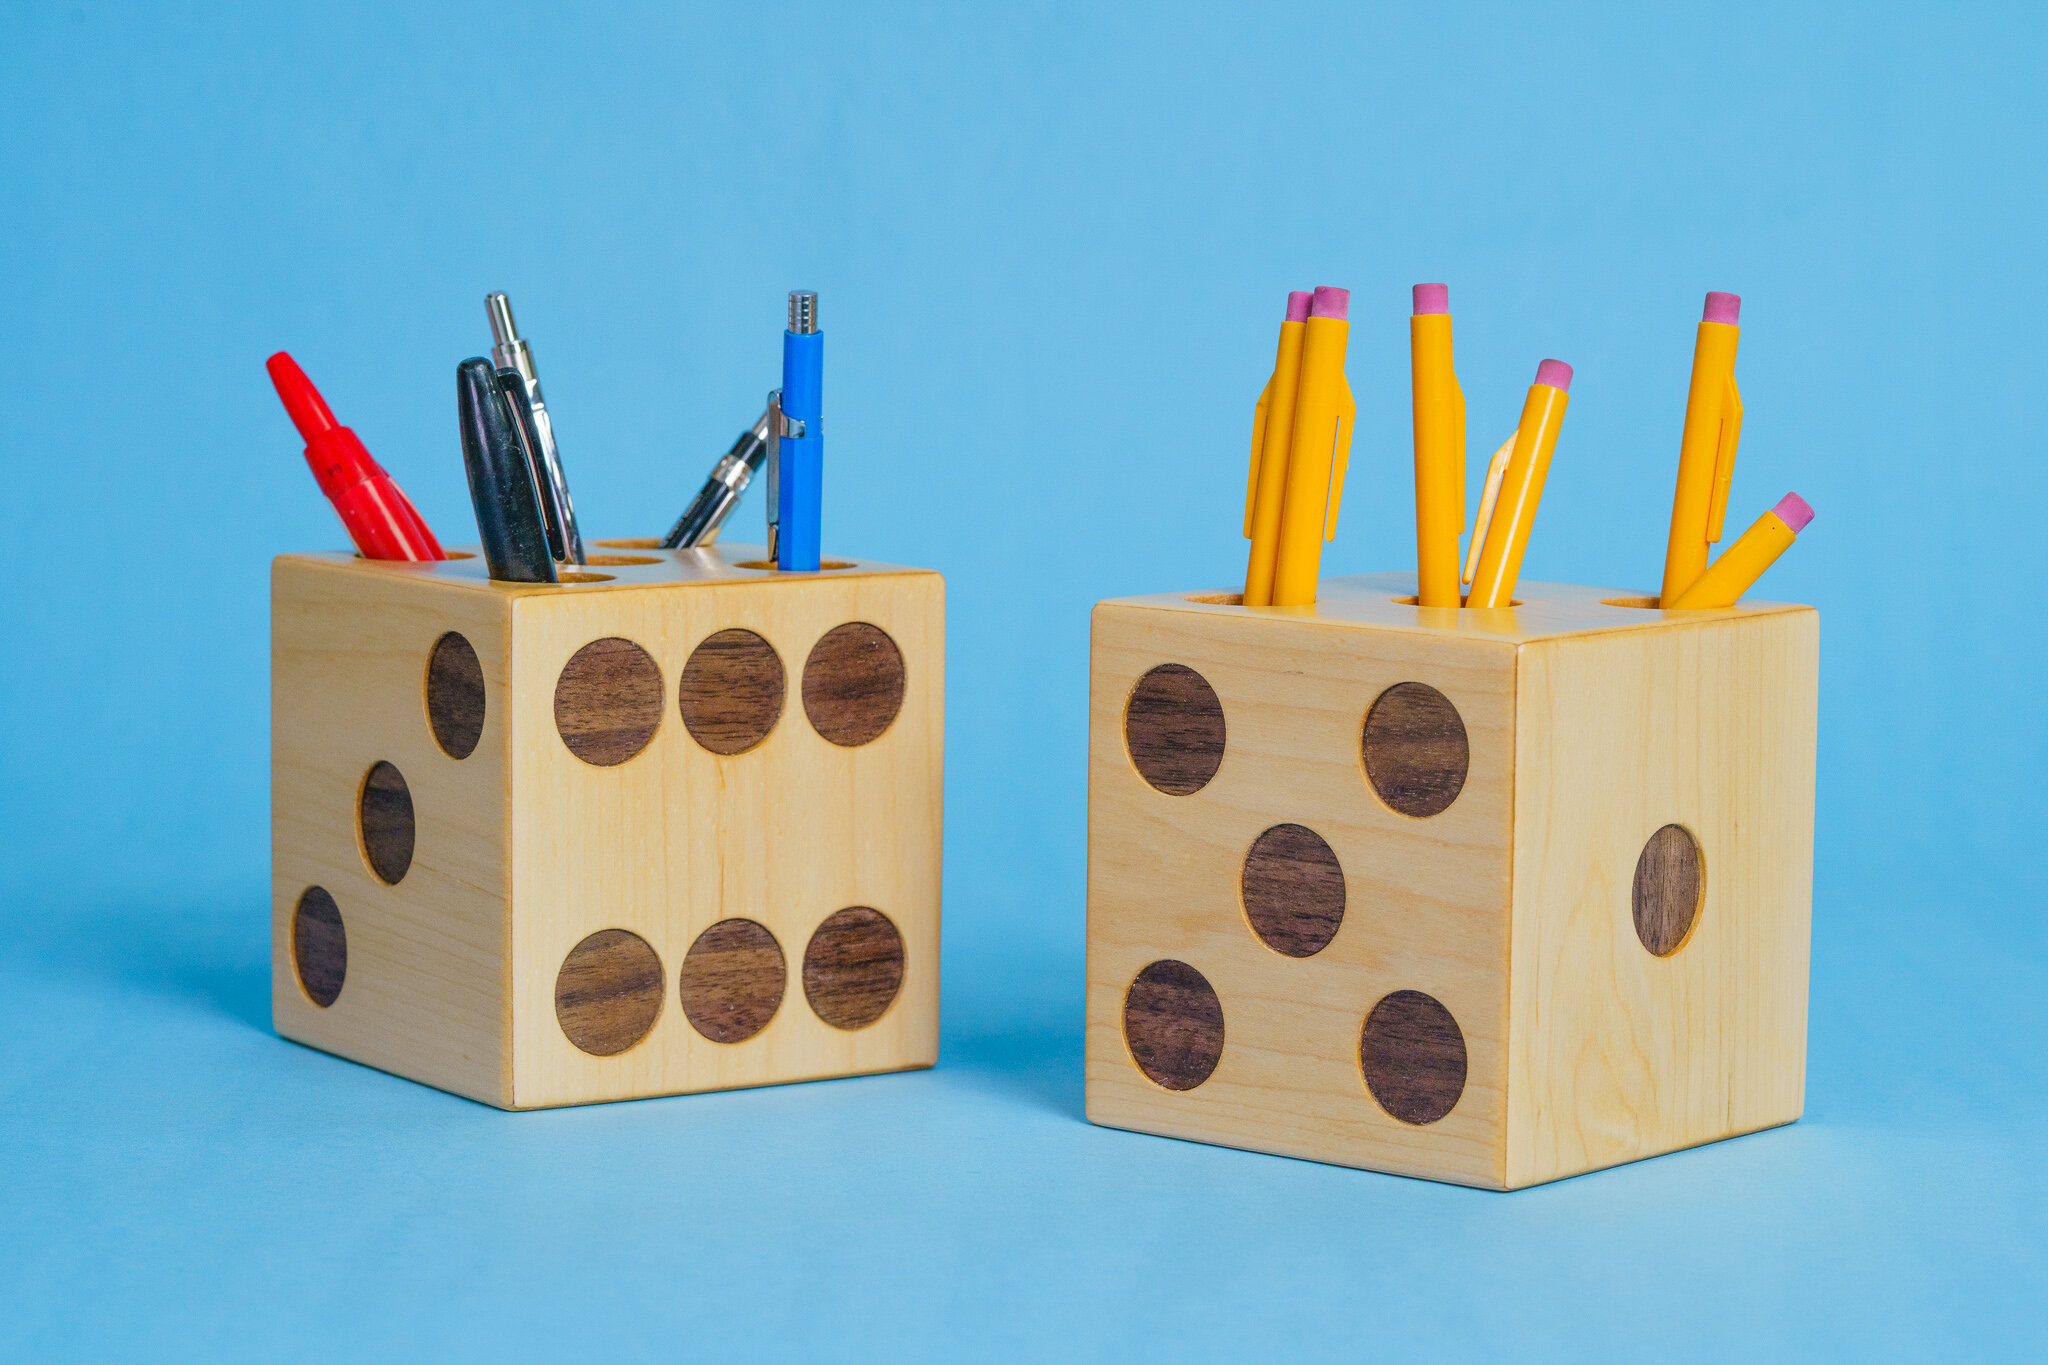
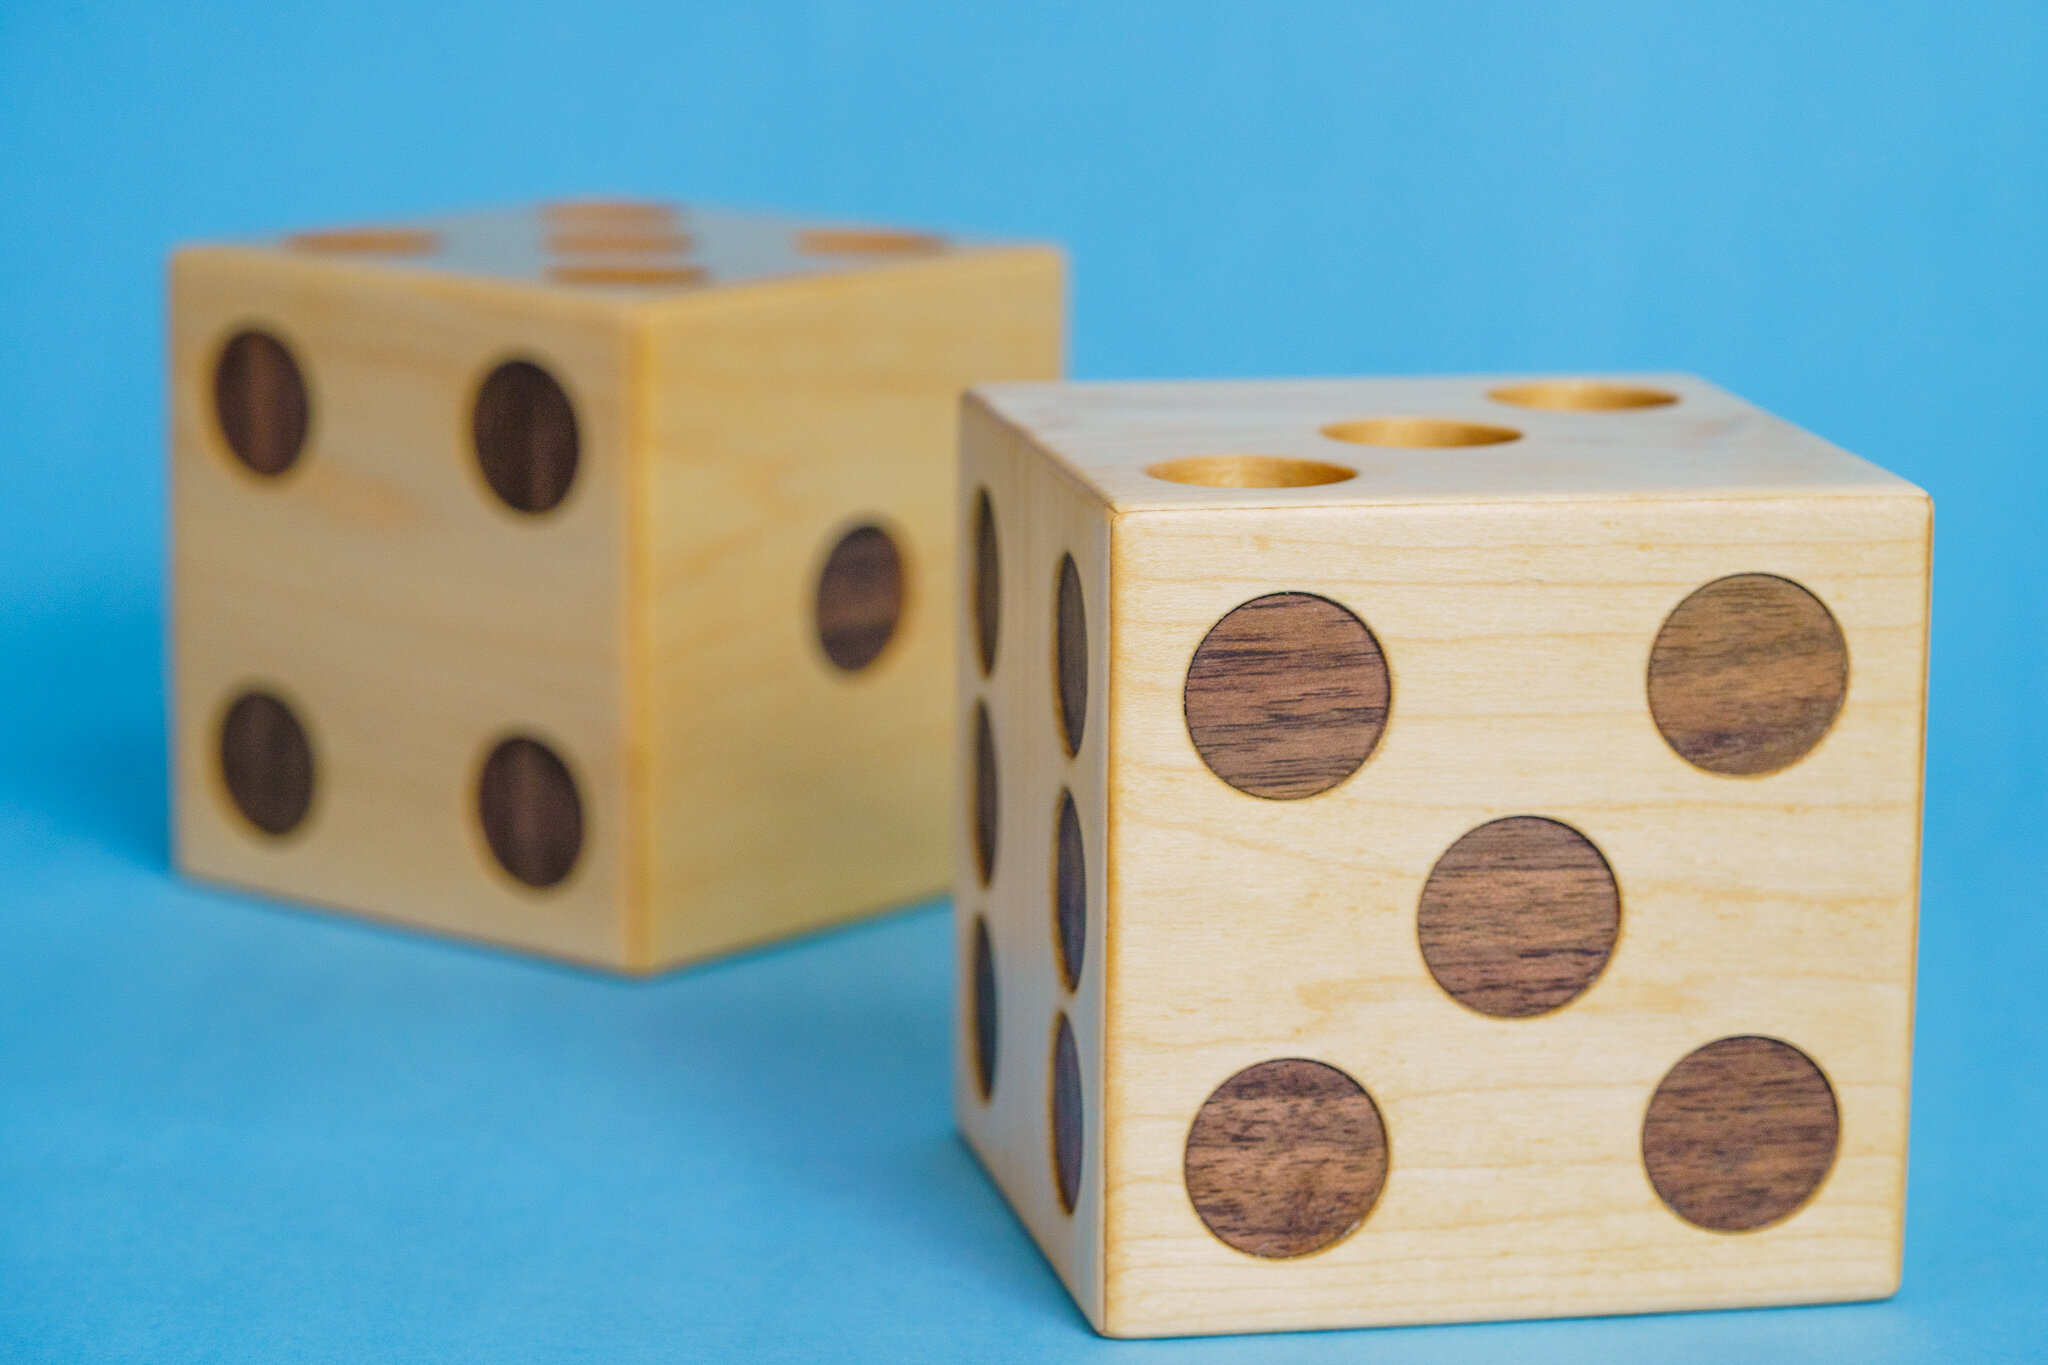
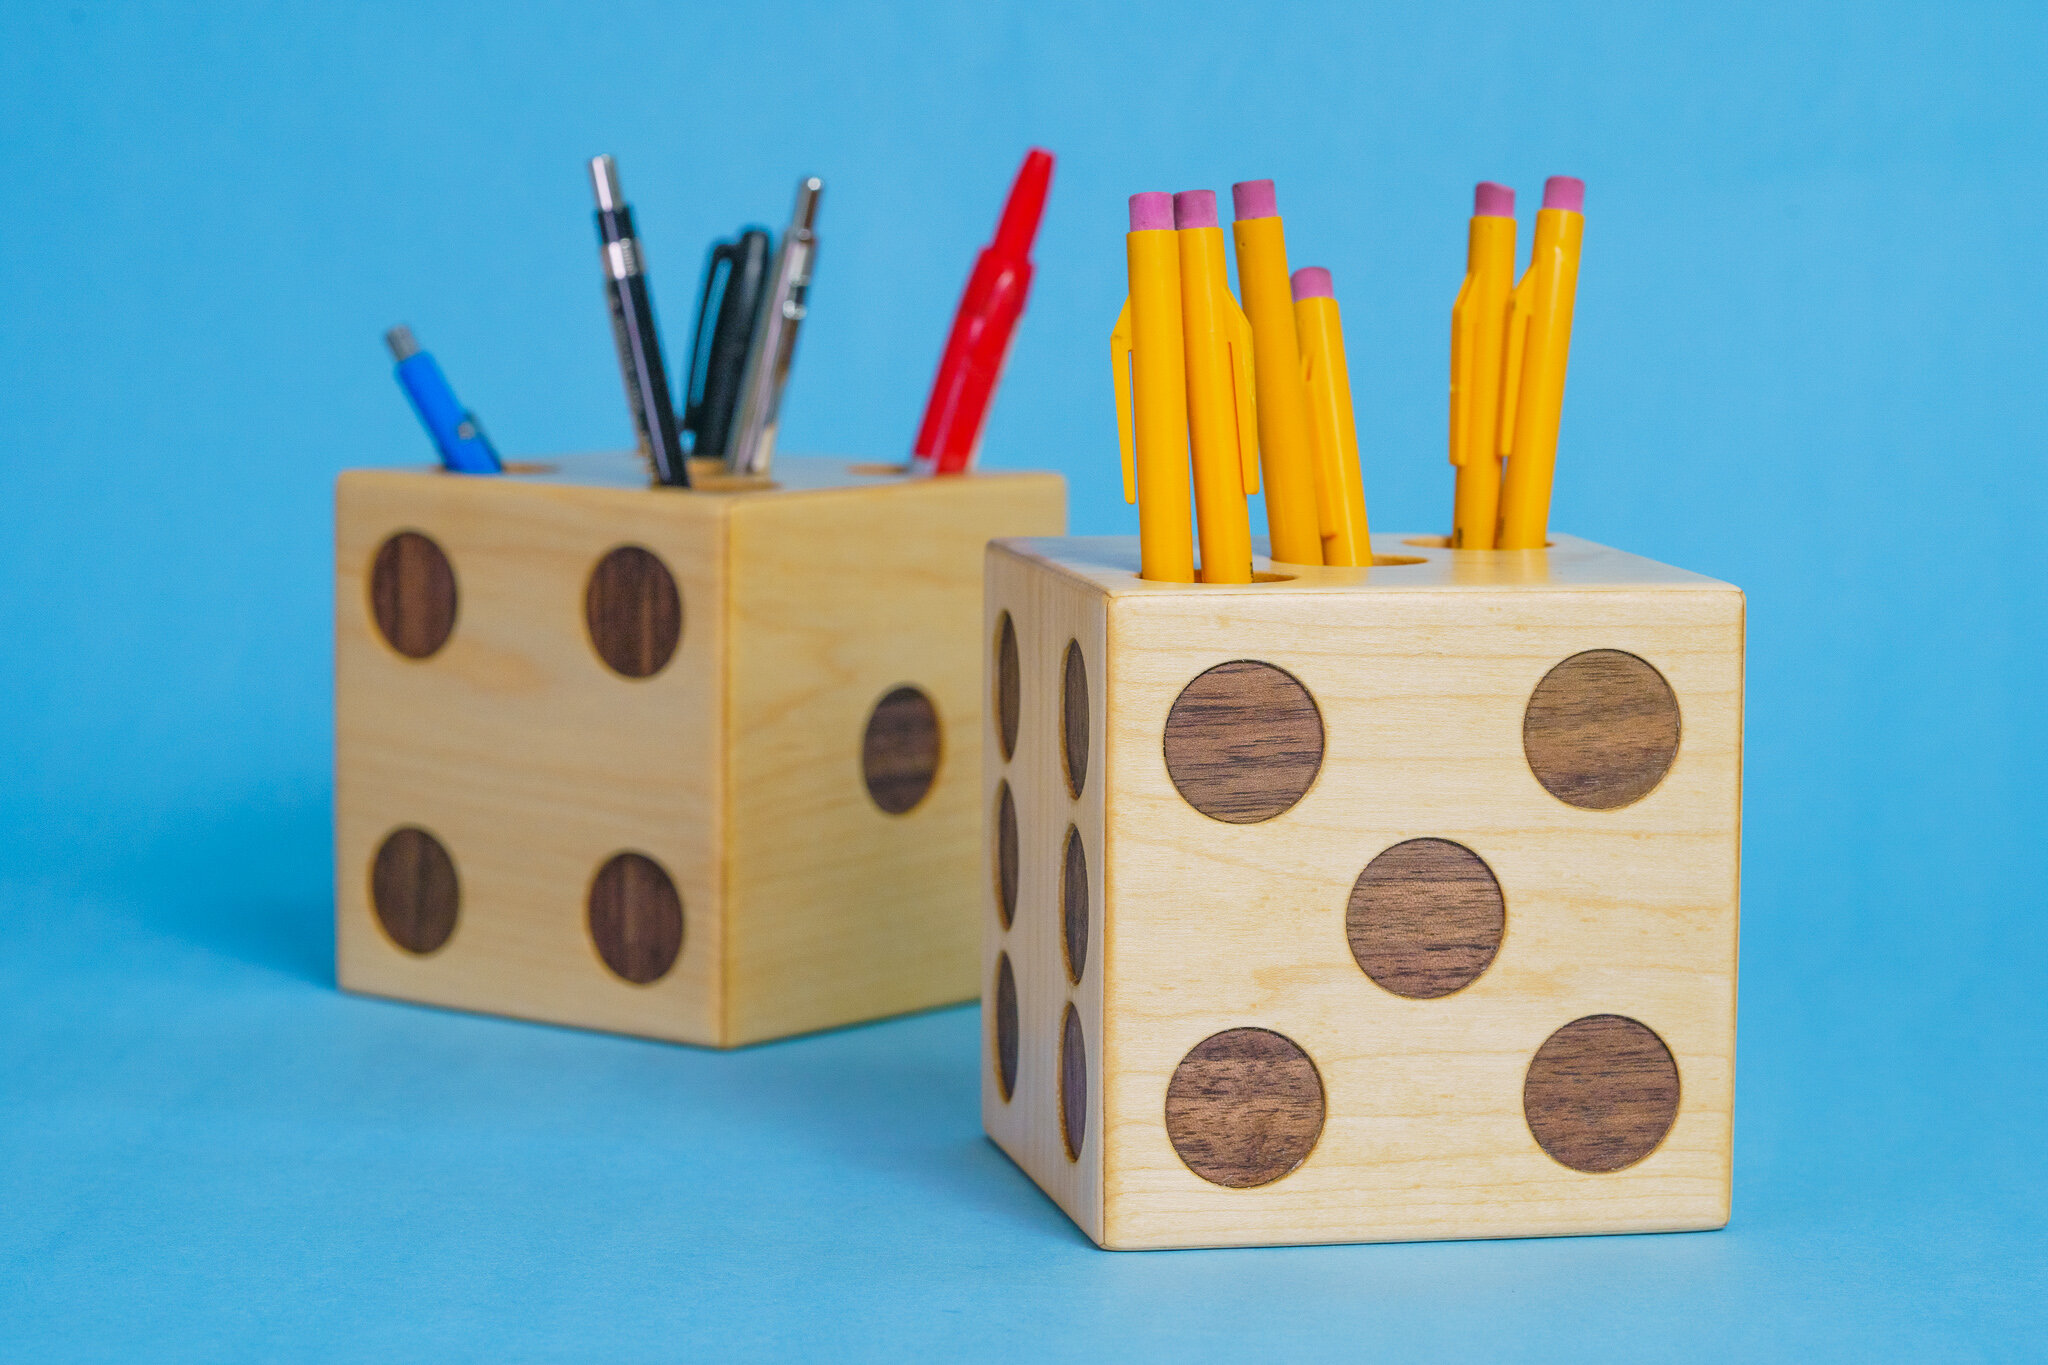
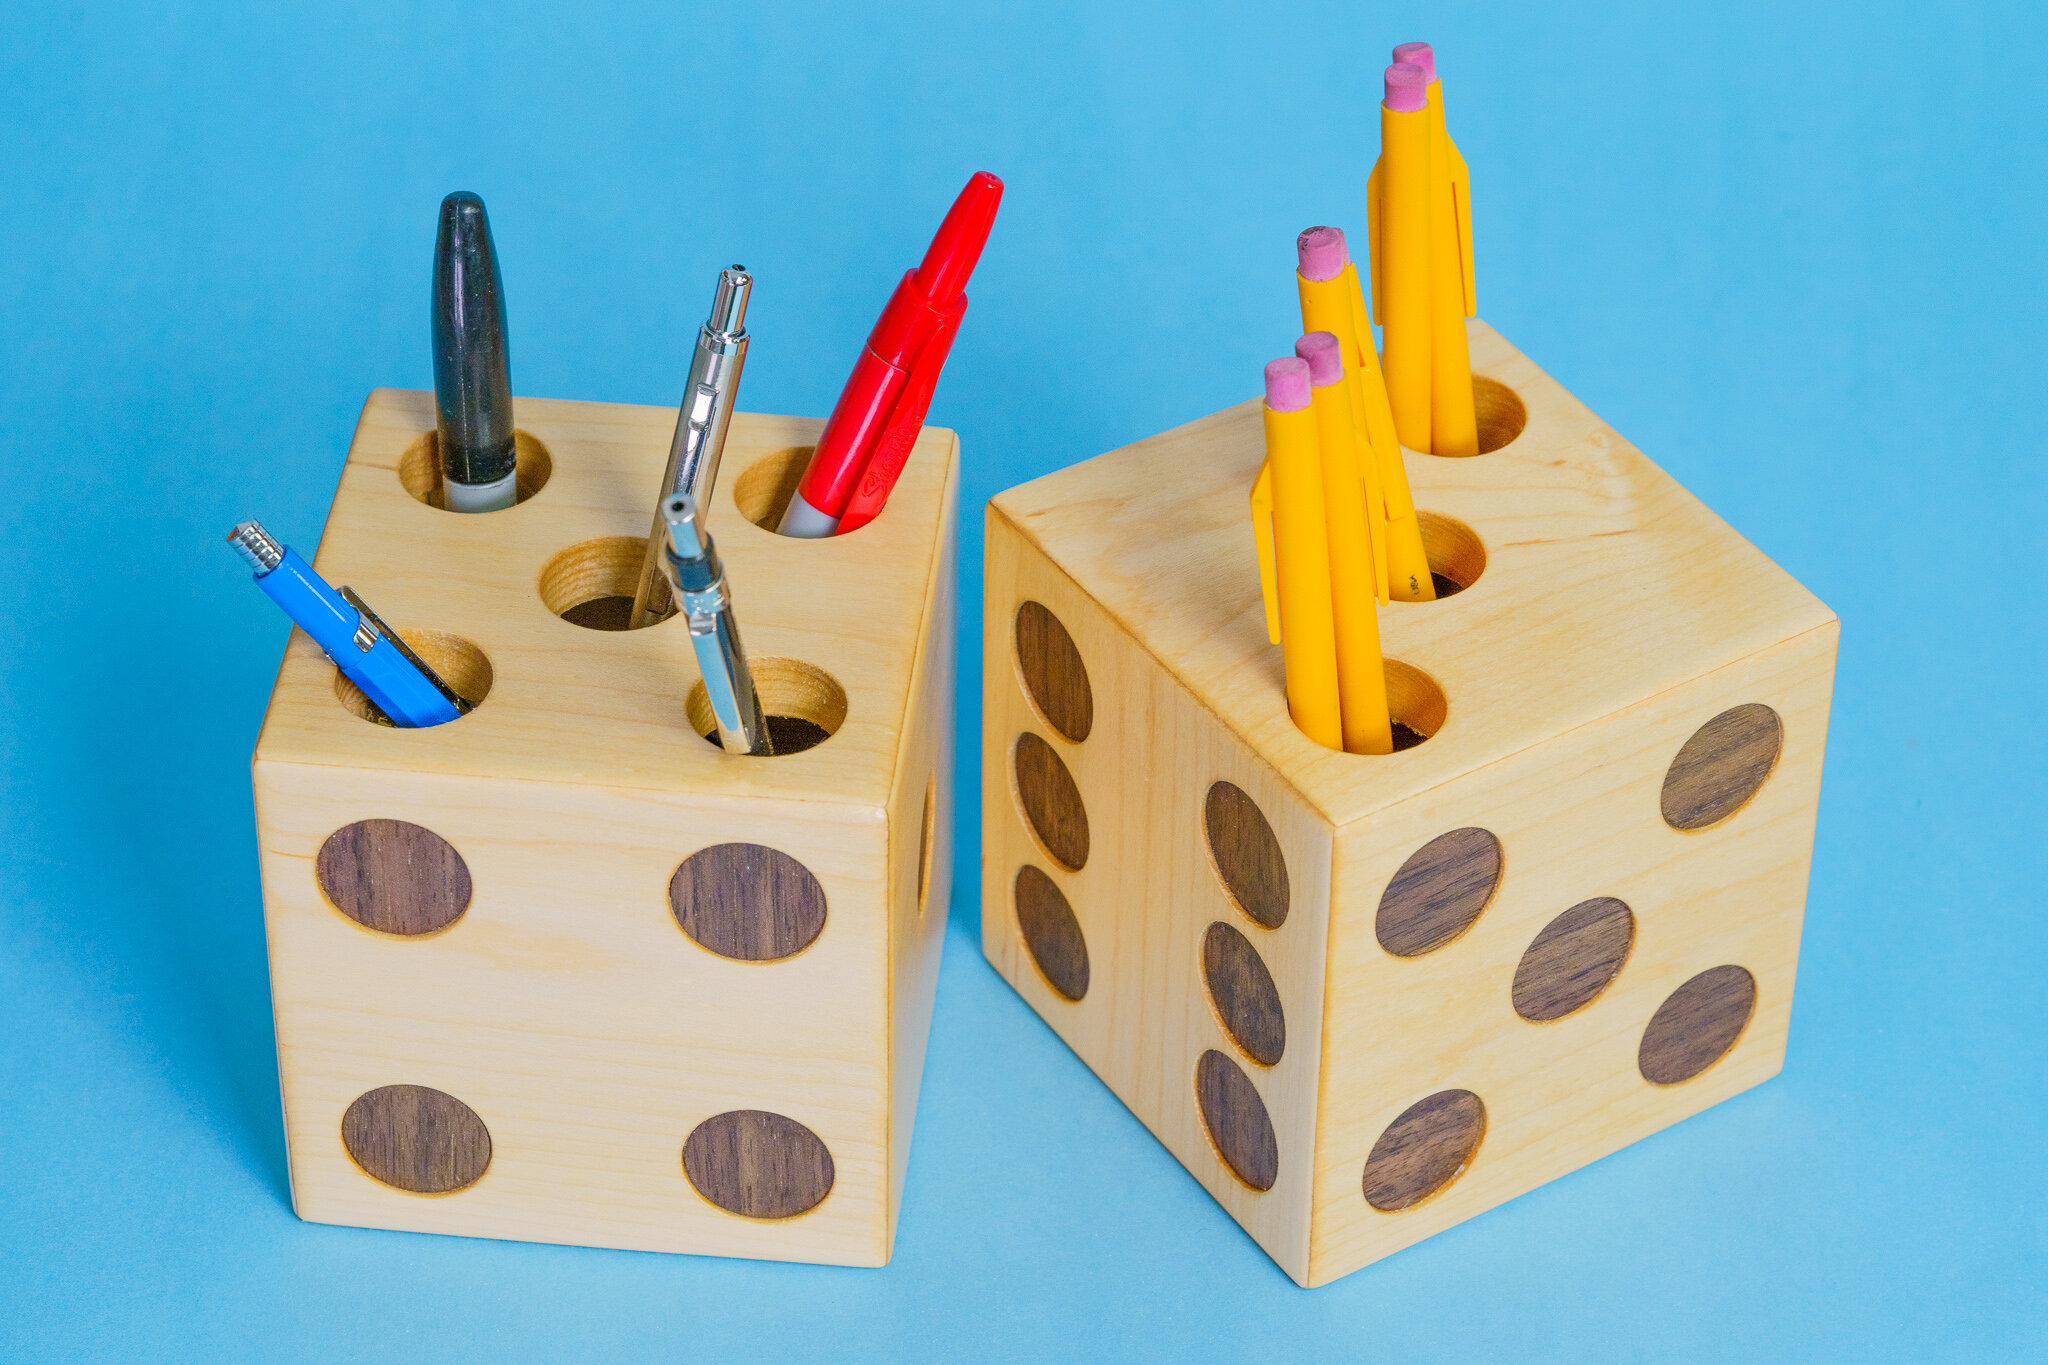
How to Make Dice Pencil Holders
How to make a pair of dice pencil holders.
Easy Woodworking Project.
How to make a pair of dice pencil holders out of maple. This is a fun weekend project you can make for yourself or batch out for selling at crafts shows and online. Get the plans here!

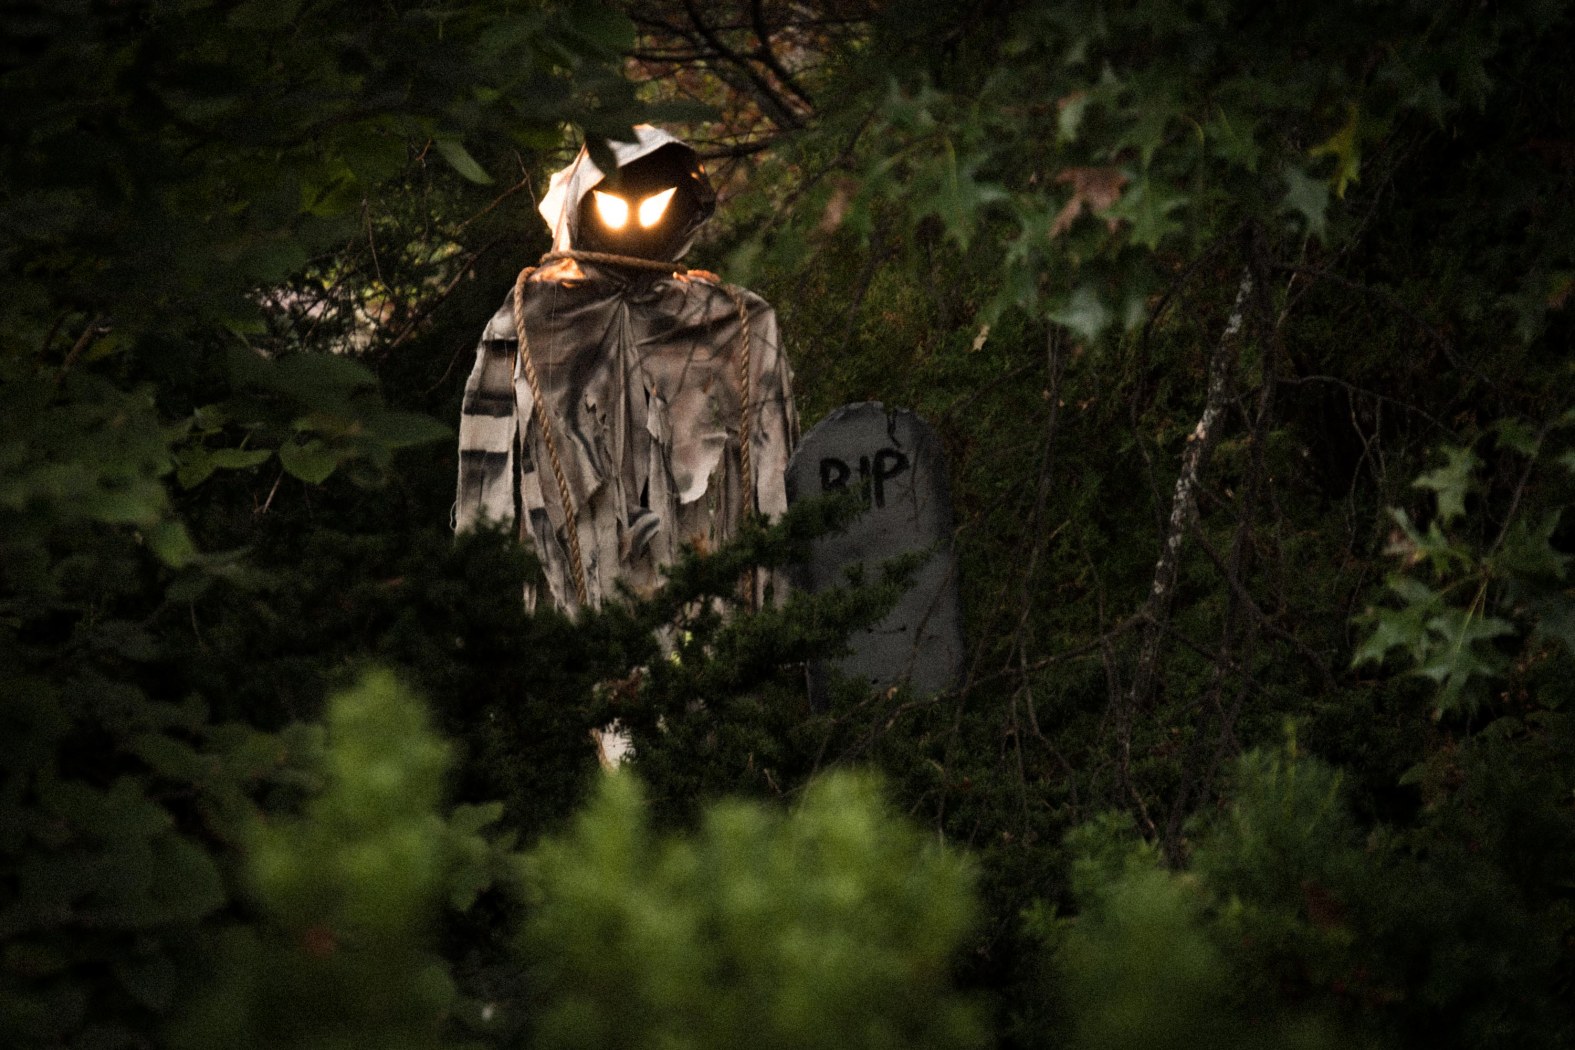
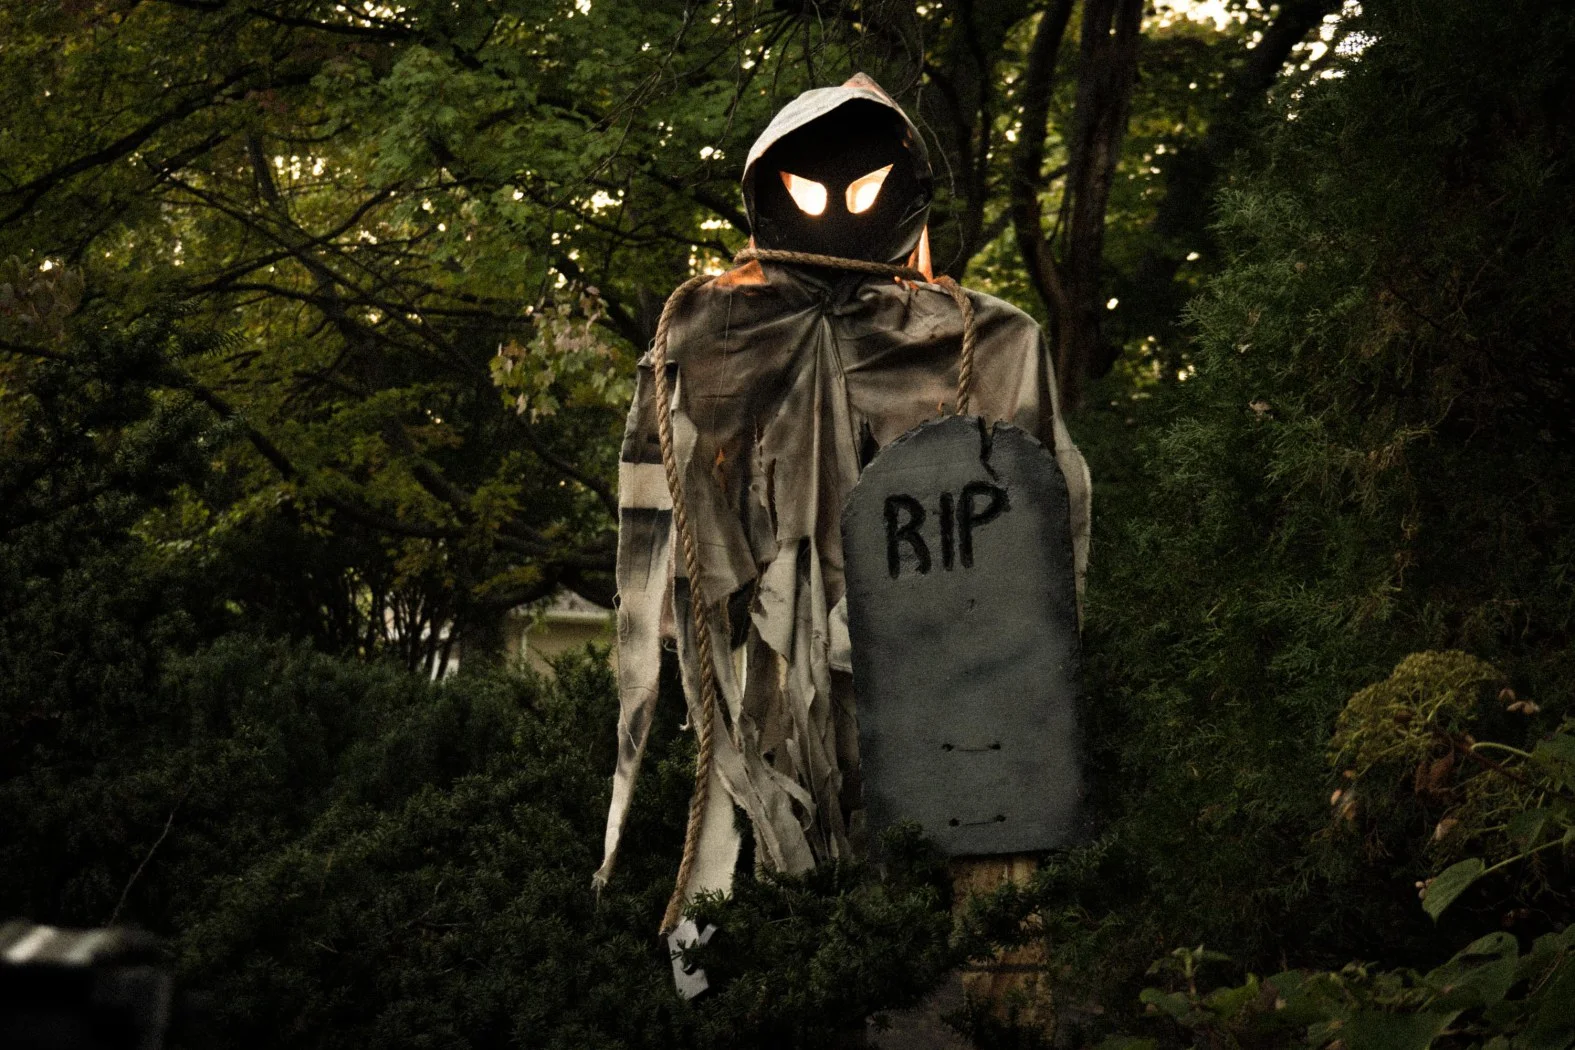
Outdoor Halloween Decor Ghost | DIY Project
How to turn an ordinary outdoor lamp into a spooky halloween ghost.
Easy Halloween Decoration | Spooky Ghost
How to turn an ordinary outdoor lamp into a spooky halloween ghost. All the materials used in this DIY project are common supplies found at your local True Value hardware store.
Tools and Supplies Used in This Halloween Project | True Value Hardware

STEP 1: Rough out the head and shoulders shape with a marker and cut it out with a jigsaw. It doesn’t need to be pretty as we’ll drape some cloth over it in the next step. Also, ghosts ain’t pretty! Now’s also a good time to paint the cutout black.

Step 2: Take some drop cloth and using a staple gun tack it to the head and shoulders. Make sure to not cover the eyes and keep it lose for a spooky effect.

Step 3: Cut the drop cloth to length and start ripping it to long thin shreds. This will help “age” the cloak and add movement in the wind.

Step 4: Now with some grey, black and brown paint you can randomly spray streaks and spots to give it that century warn look.

Step 5: To add a tombstone to your halloween yard decor take some insulation foam board and cut out a tombstone shape. This can easily be done with a utility knife. In this example I also carved out the letters “RIP” and scalloped the edges for a more authentic look.

Step 6: Now you can add some color to your tombstone with some grey and black spray paint.

Step 7: Use what works best for your yard. For my halloween display I needed my tombstone to peak over the bushes so I cut out a stake and attached it using zip ties.

Step 8: Finally, you can attach your spooky halloween ghost to your light pole. Now just wait for it to get dark and turn on your light!
CAUTION: Make sure your light doesn’t get hot as you don’t want to start a fire. If you find it does get hot you can fine replacement LED bulbs that don’t throw off any heat.

Turning Rotten Walnut Wood Into Art
I take a trip to my local hardwood dealer to look for walnut that would typically be thrown out so we can turn it into art.
Woodworking Project. Nature Made Art
This week we take a trip to my local hardwood dealer Kencraft Company in Toledo, Ohio to look for walnut that would typically be thrown out so we can turn it into art. We found a large gnarly piece with a rotten worm hole that we resawed into a book matched pair. The heart shaped hole left by the worm holes was backed with a bright red velvet fabric to highlight the beautiful pattern left by nature.
The overall size of the piece is 25″ x 25″ framed with a nice contrasting cherry and finished with boiled linseed oil.
Tools and Supplies Used in This Woodworking Project


Making Art Out of Walnut Knots
Super fun and easy woodworking project using walnut knots to turn into wall hanging art.
Instead of Throwing Away Those Ugly Knots Turn Them Into Art!
Super fun and easy woodworking project using walnut knots to turn into wall hanging art. I went to my local hardwood dealer and asked them if they had any ugly knots and while I was there I had them resaw it into four slices. This will allow me to book match them into a 4-up configuration inspired by Andy Warhol. I used home center paint chips taped to the back to allow the color to pop through. These colorful chips can be swapped out to compliment the colors of your wall, match seasonal colors or show off your favorite sports team.
Tools and Supplies Used In This Woodworking Project


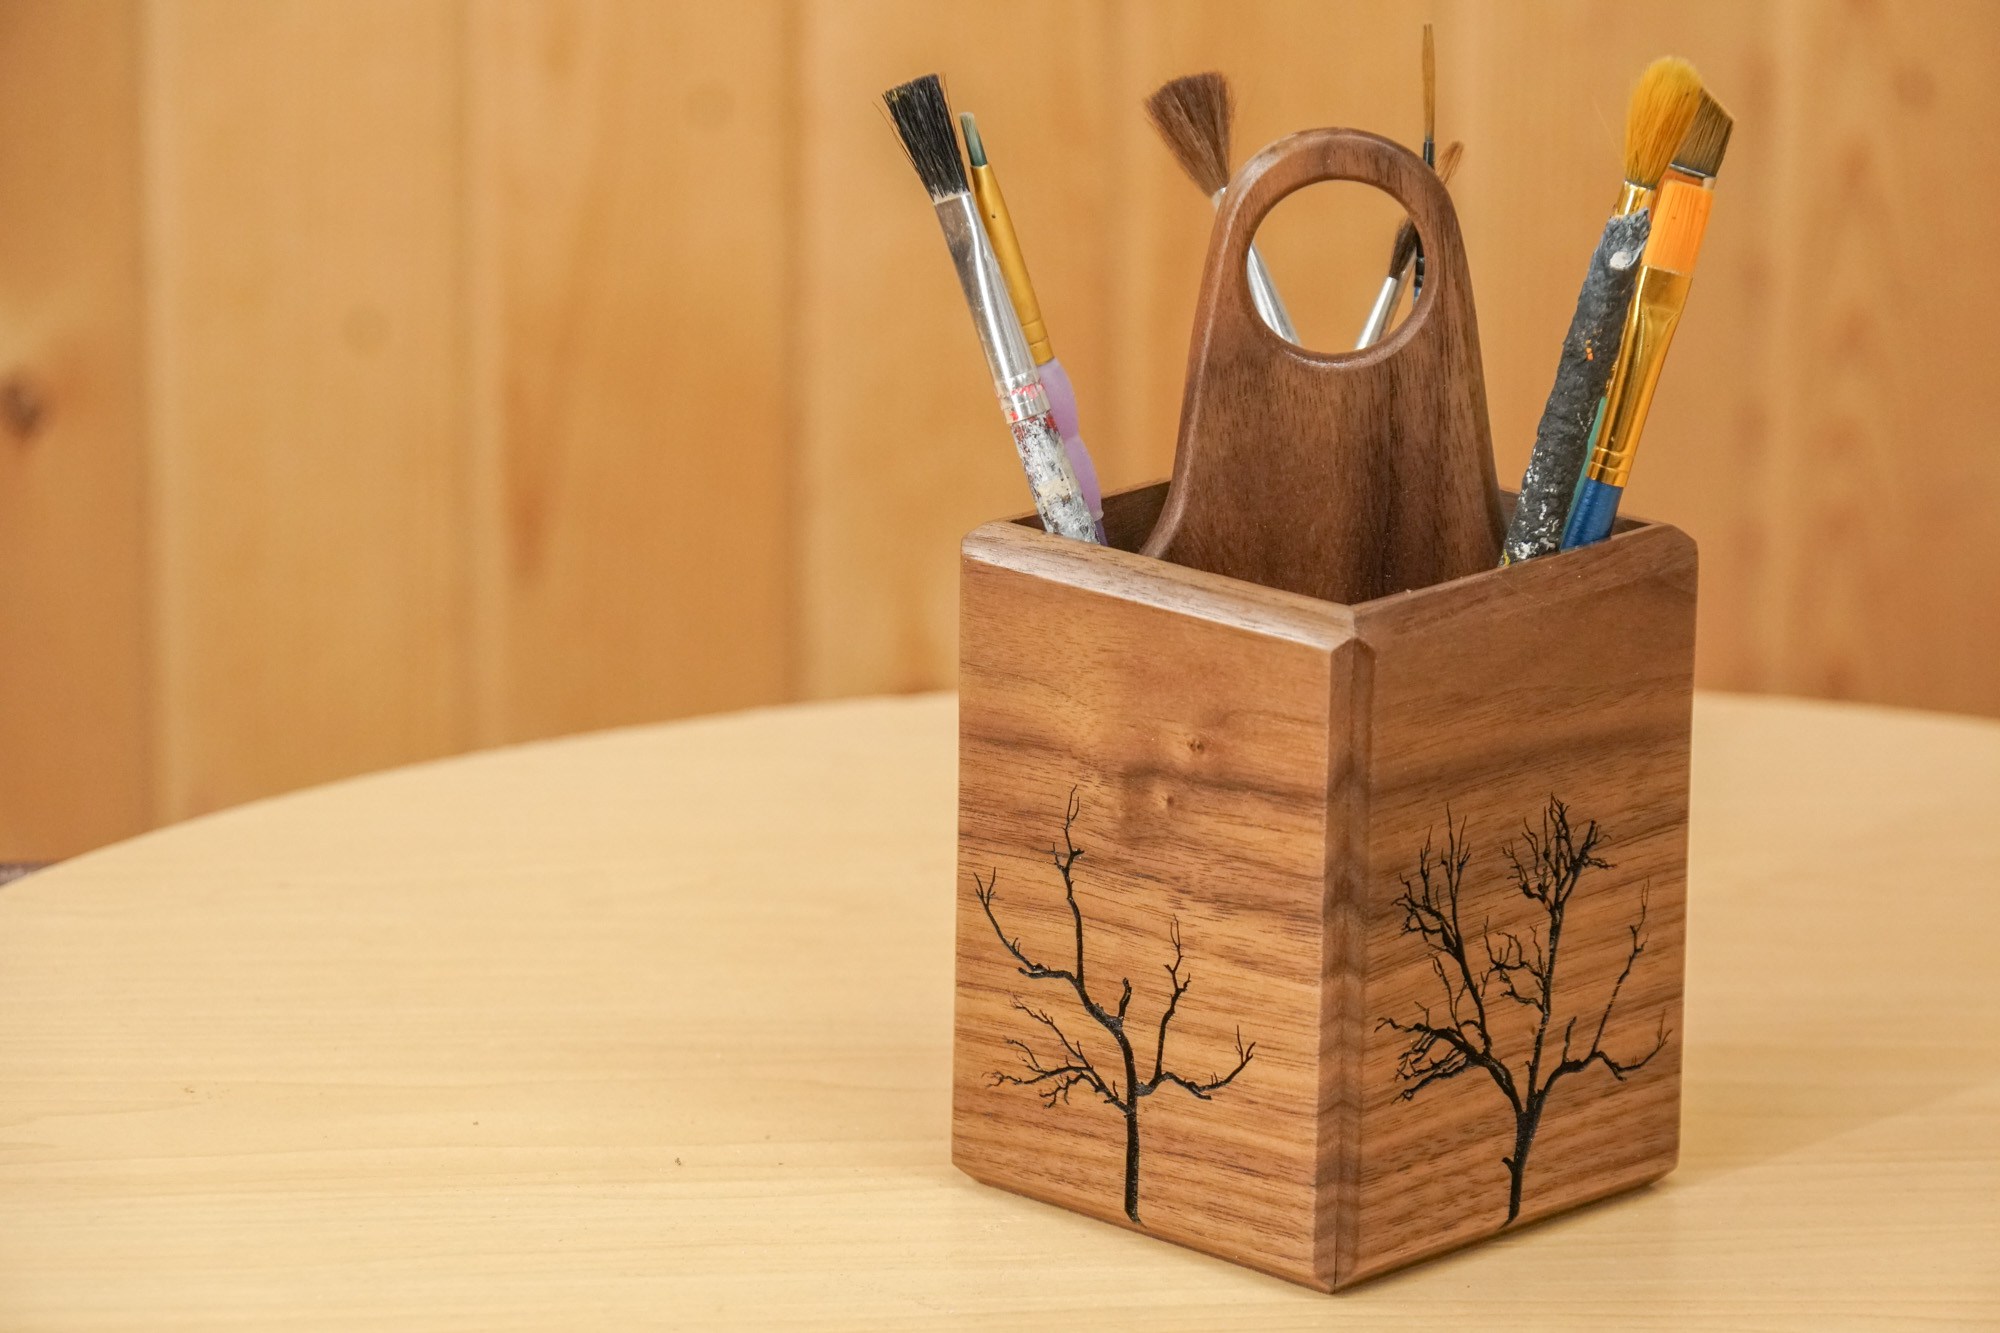
How to make a Pencil Holder/Art Caddy
Making this pencil holder/art caddy is a quick and simple woodworking project that can easily be made in an afternoon.
Making this pencil holder/art caddy is a quick and simple woodworking project that can easily be made in an afternoon. I began my resawing some 3/4″ walnut in half to use for all the pieces. The 4 main side are all cut to the exact same size with a 45° bevel on all the edges for easy joinery. The pieces are glued together and clapped with nothing but blue painters tape. There’s an inserted divider to keep different utensils separated and everything is coated with 2 coats of shellac.
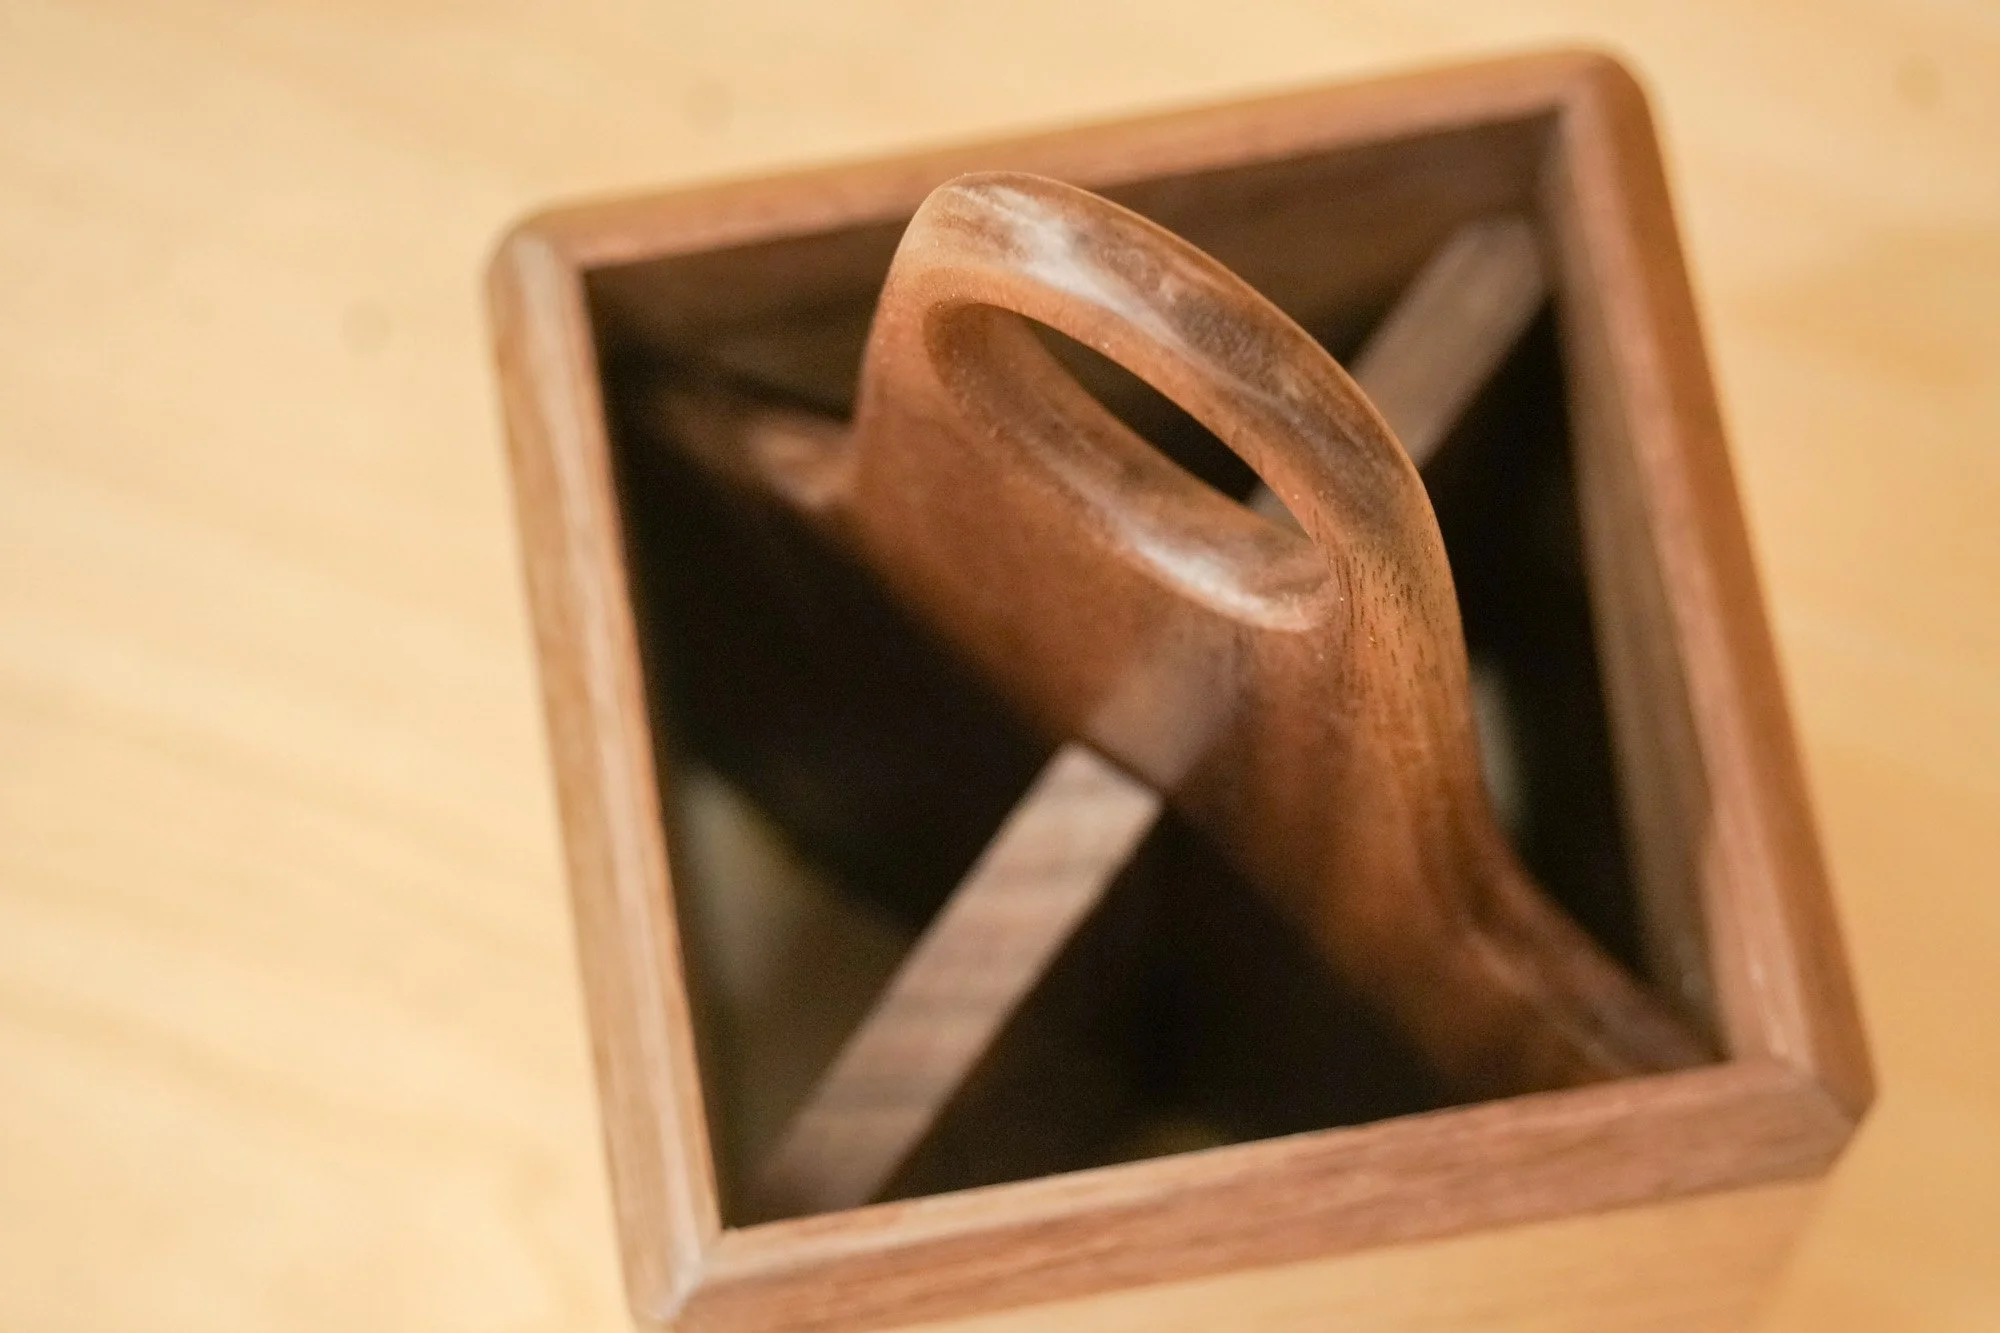


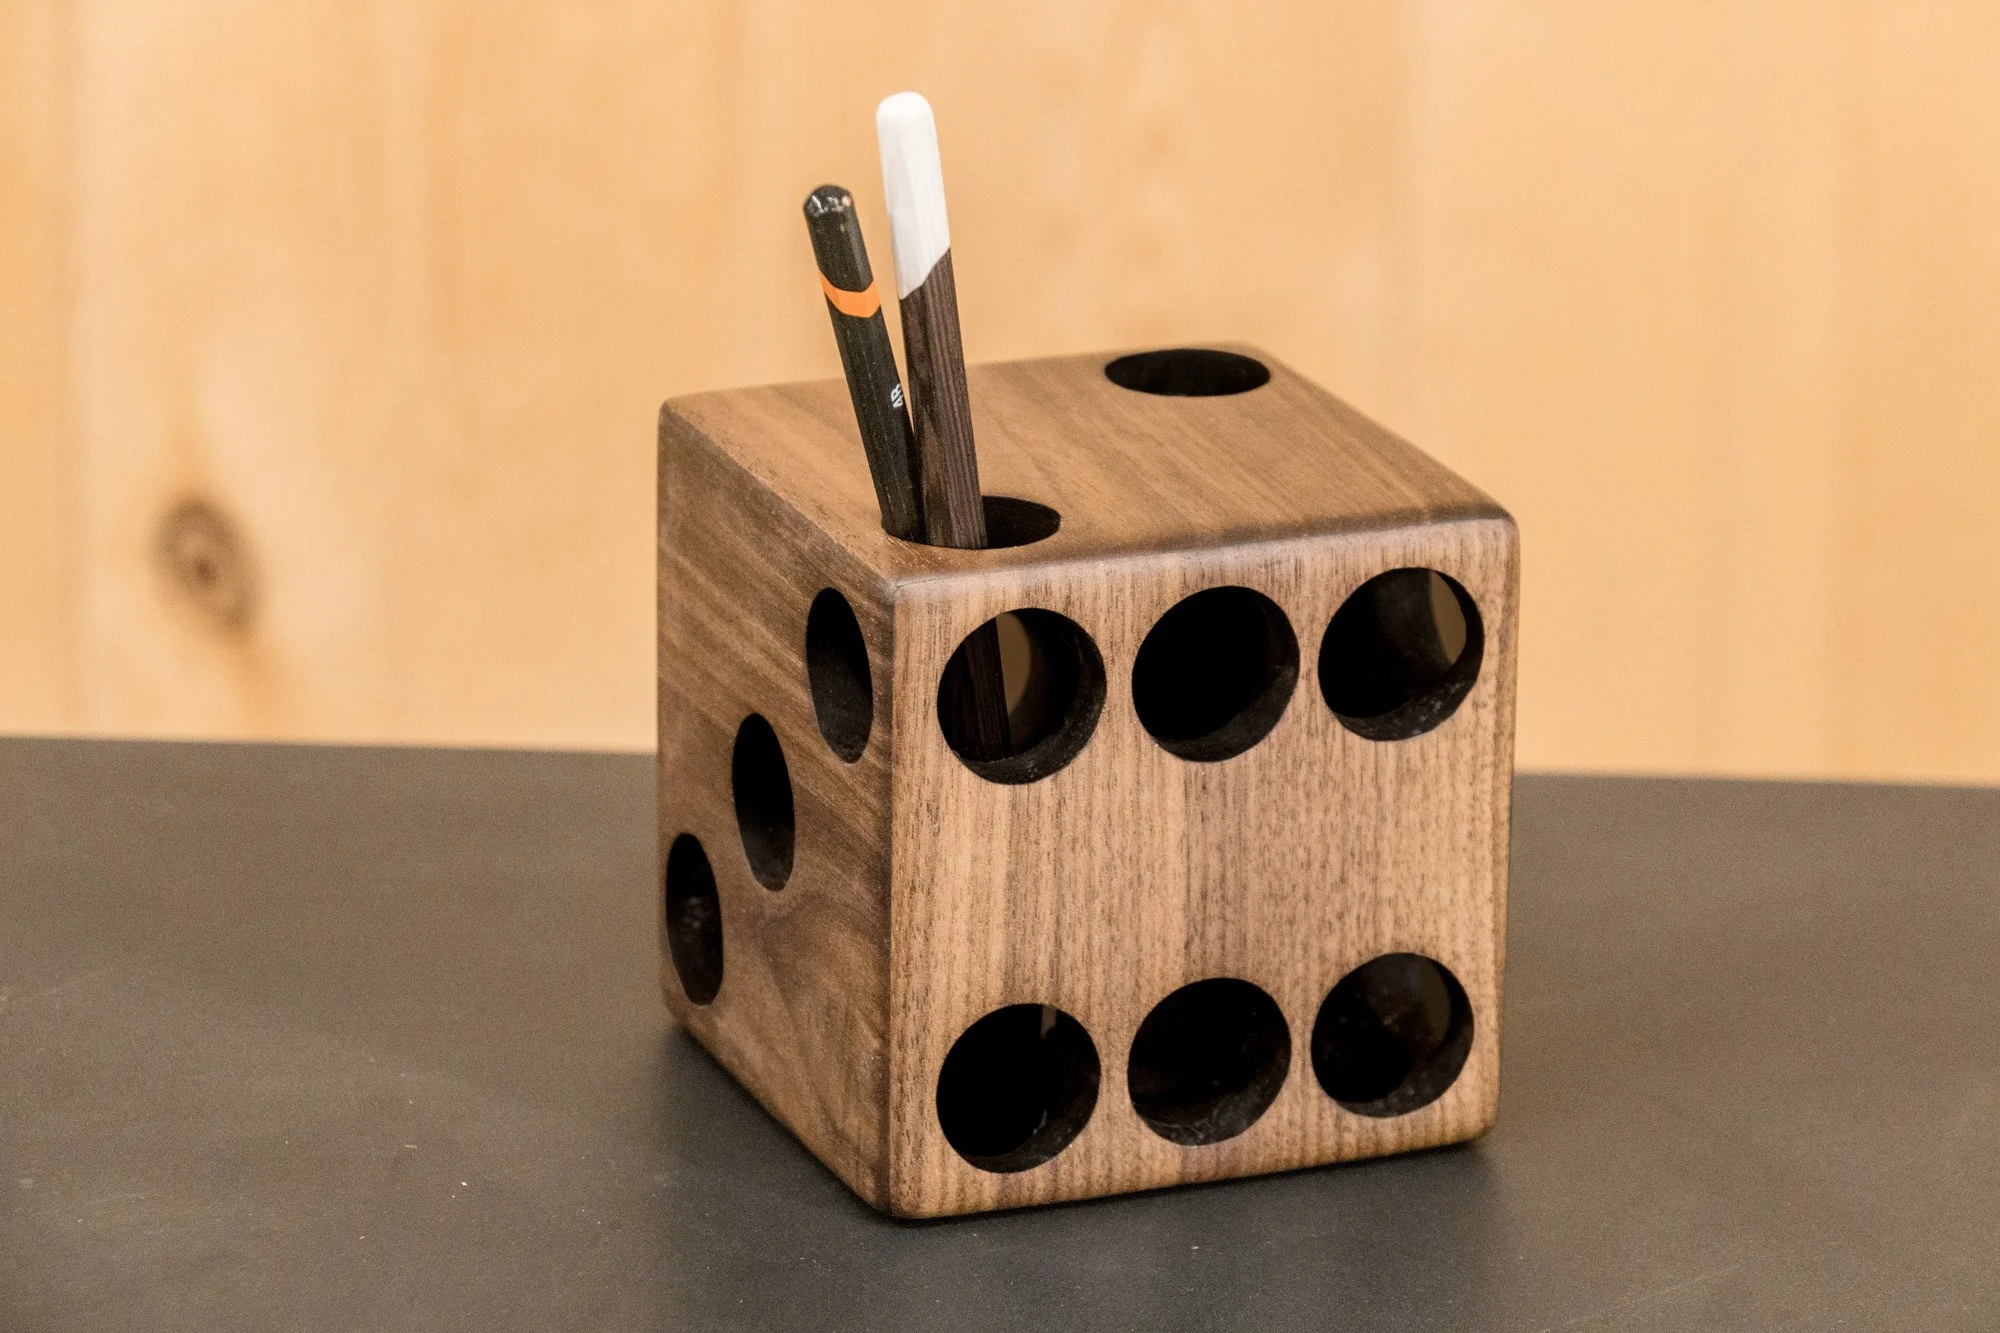
How to Make a Walnut Dice Pencil Holder
This is a simple and easy woodworking project that can be made with just a few tools.
Easy Woodworking Project. Great for Craft Shows!
This is a simple and easy woodworking project that can be made with just a few tools. I’m using walnut planed down to 1/2″ thick and cut in perfect squares on the tablesaw. All the edges are mitered for easy joinery with just some blue painters tape and some Titebond wood glue. Originally I had painted the inside black with white paint around the hole edges. Halfway through the project I decided I prefer the natural look of the walnut without paint and sanded everything back down to bare wood. Finished with boiled linseed oil and paste wax. You can find the templates down below by signing up for my email list.
Tools and Supplies Used in this Woodworking Project


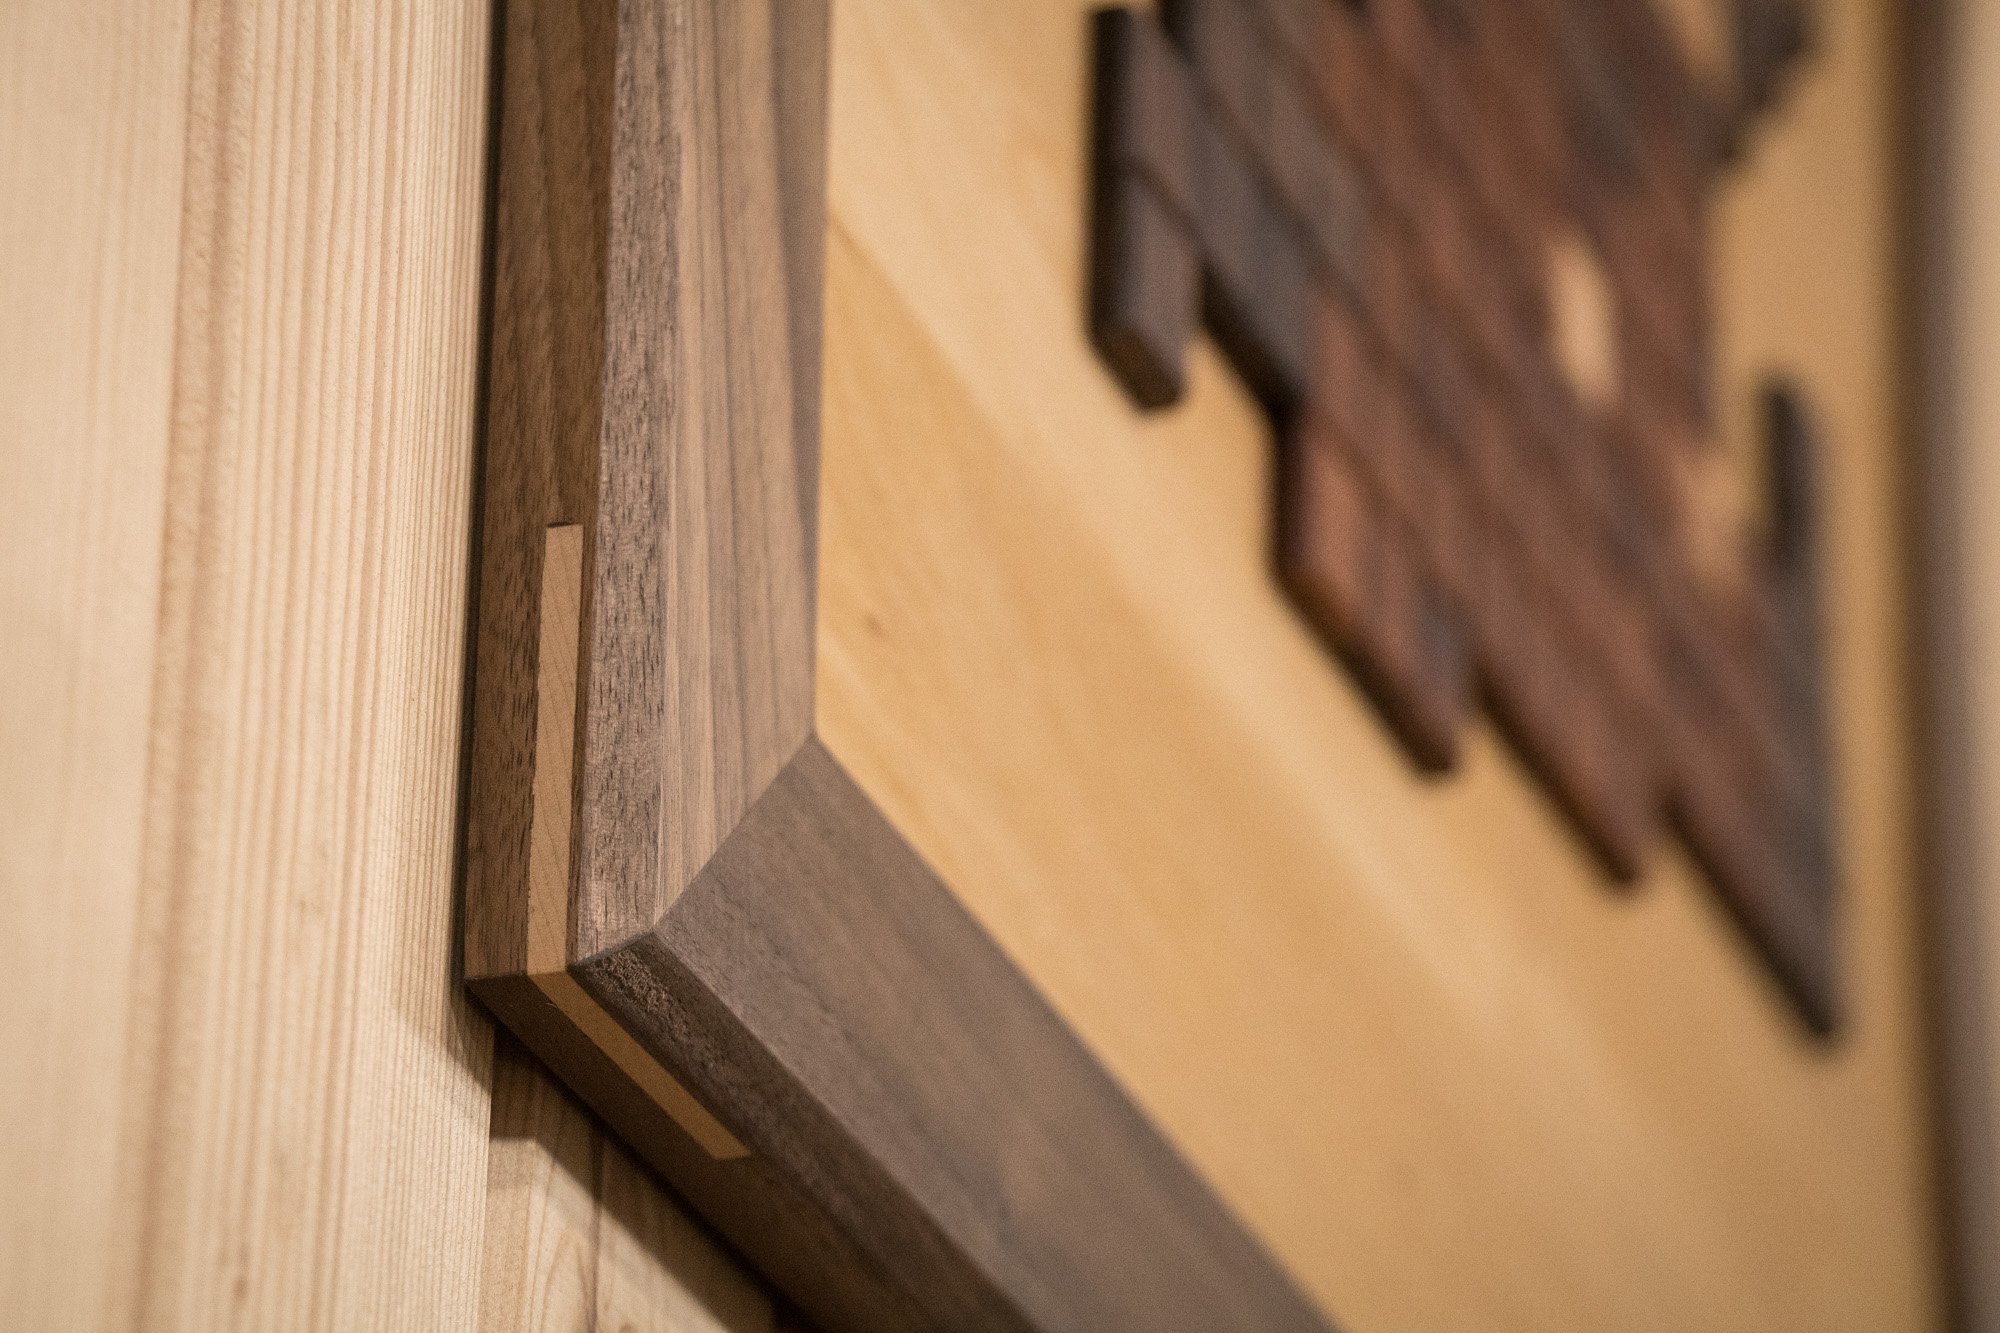
Super Mario Made From Wood. Pixel by Pixel
How to make a Super Mario Bros wood art piece pixel by pixel using different wood species.
Although tedious, this was a fun woodworking project. Like many I grew up playing Super Mario Bros. on the NES and I still find myself playing once in a while as an adult. I’ve made this once before a few years ago before I was making videos and thought I’d recreate it to show how it’s done. I’m using three different species of wood for the three colors of Mario. Hard maple, walnut and mahogany are used for the skin color, shirt and overalls. Each piece is a 1” x 1” square glued to a piece of baltic birch plywood with CA glue. To give each piece more definition I chamfered the edges on my disc sander. The frame made from walnut measures 27” x 27” square and also has a matching chamfer.
Tools and supples used in this woodworking project


How to Make a Rotating Crayon Holder
This is an easy and fun woodworking project that works great for displaying and organizing a set of 64 crayons!
Easy Woodworking Project
This is an easy and fun woodworking project that works great for displaying and organizing a set of 64 crayons! I’m using a lathe to do most of the work but this could easily be made without one using a bandsaw. The handle is made from a globe squishy ball found at my local craft store which is a great alternative to using wood. When I originally designed the project I planned on using a lazy Susan base for spinning but decided in the end it was overkill and not needed. If I were to make more of these wood crayon displays I would take the plastic sharpener that comes with the crayons and mount it on the side with a removable base for emptying out the shavings.
Tools and Supplies Used in this Woodworking Project
- Microjig GRR-Ripper
- Microjig GRR-RIP Blocks
- Crayons
- Grizzly Bandsaw
- Dewalt Planer
- Table Saw
- Aluminum Bar Clamps
- Titebond Wood Glue
- Bessey Clamps
- Festool Miter Saw
- Combination Square
- Compass
- Jet Lathe
- Black & Decker Drill
- Festool Drill
- Turning Tools
- Dust Mask
- Festool Random Orbit Sander
- Jet Drill Press
- Shellac
- Felt
- Squeeze Globe (similar)


How to Ruin Grandma’s Cookie Recipe in Epoxy!
A failed experiment that had unwanted results. It’s all part of the learning process.
So I had this crazy and wacky idea to take a cookie recipe, bake the cookies and encase that cookie and the recipe card in epoxy. This could then hang on the kitchen wall and you could always be reminded of Grandma’s recipe and see exactly what the cookie looks like. I wanted to do this all with supplies you could get from your local home center and not need any fancy woodworking tools. I attempted this twice and failed each time. If you watch the video above you’ll see that I tried to pour all the epoxy at once and I should have done it in layers and allowed it to dry between layers. By pouring it all at once it doesn’t cure evenly. I also used a heat gun to get the bubbles out and that speeds up the curing process which is a no no! Instead I should have used a small butane torch. If you do try this and you’re successful please let me know because I’d love to see this work!
Items Used
Cookie Recipe
- 2 1/4 cup flour
- 1 tsp baking soda
- 1/2 tsp salt
- 1 cup butter
- 3/4 cup sugar
- 3/4 cup brown sugar
- 2 tsp vanilla extract
- 2 eggs
- 2 cups chocolate chips
- Preheat oven to 375°.
- Stir flour, baking soda and salt. Set aside.
- Beat butter, sugar, brown sugar at medium speed until creamy.
- Add vanilla and eggs one at a time, mix at low speed.
- Gradually bled dry mixture into creamed mixture.
- Stir in chocolate chips.
- Drop by tablespoon onto uncreased cookie sheet.
- Bake 9 to 11 minutes.


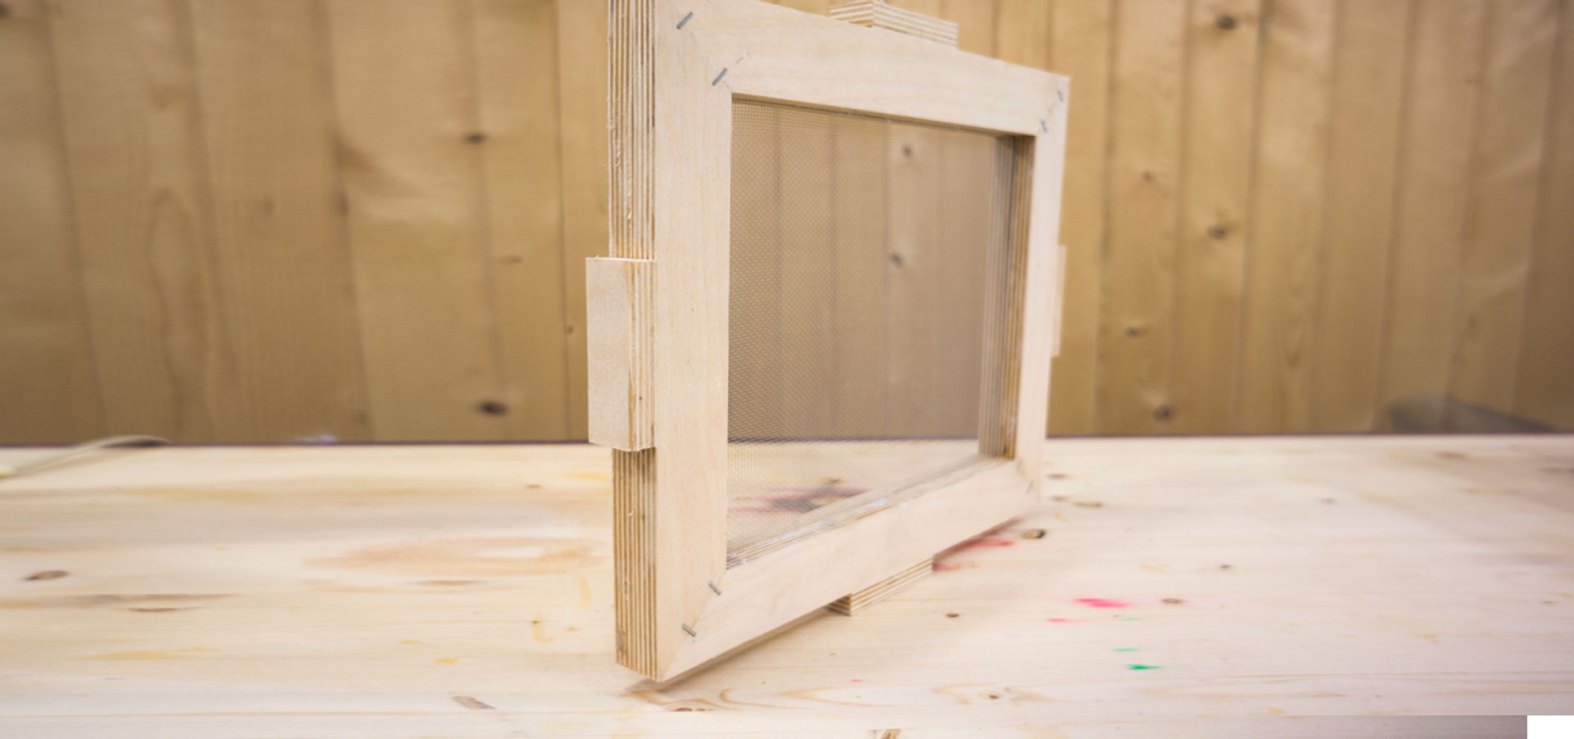
How to Make a Deckle For Paper Making
Making a homemade paper deckle is a real quick and easy project that anyone can do.
Products Used
Making a homemade paper deckle is a real quick and easy project that anyone can do. If you don’t have power tools you could make this paper making deckle with old picture frames. I’m using some scrap 1/2” baltic birch plywood and gluing the mitered corners with CA glue and staples. The screen used on this deckle is just ordinary aluminum window screening. The top half of the deckle is used as the paper mold and friction fits on top of the bottom half of the deckle.

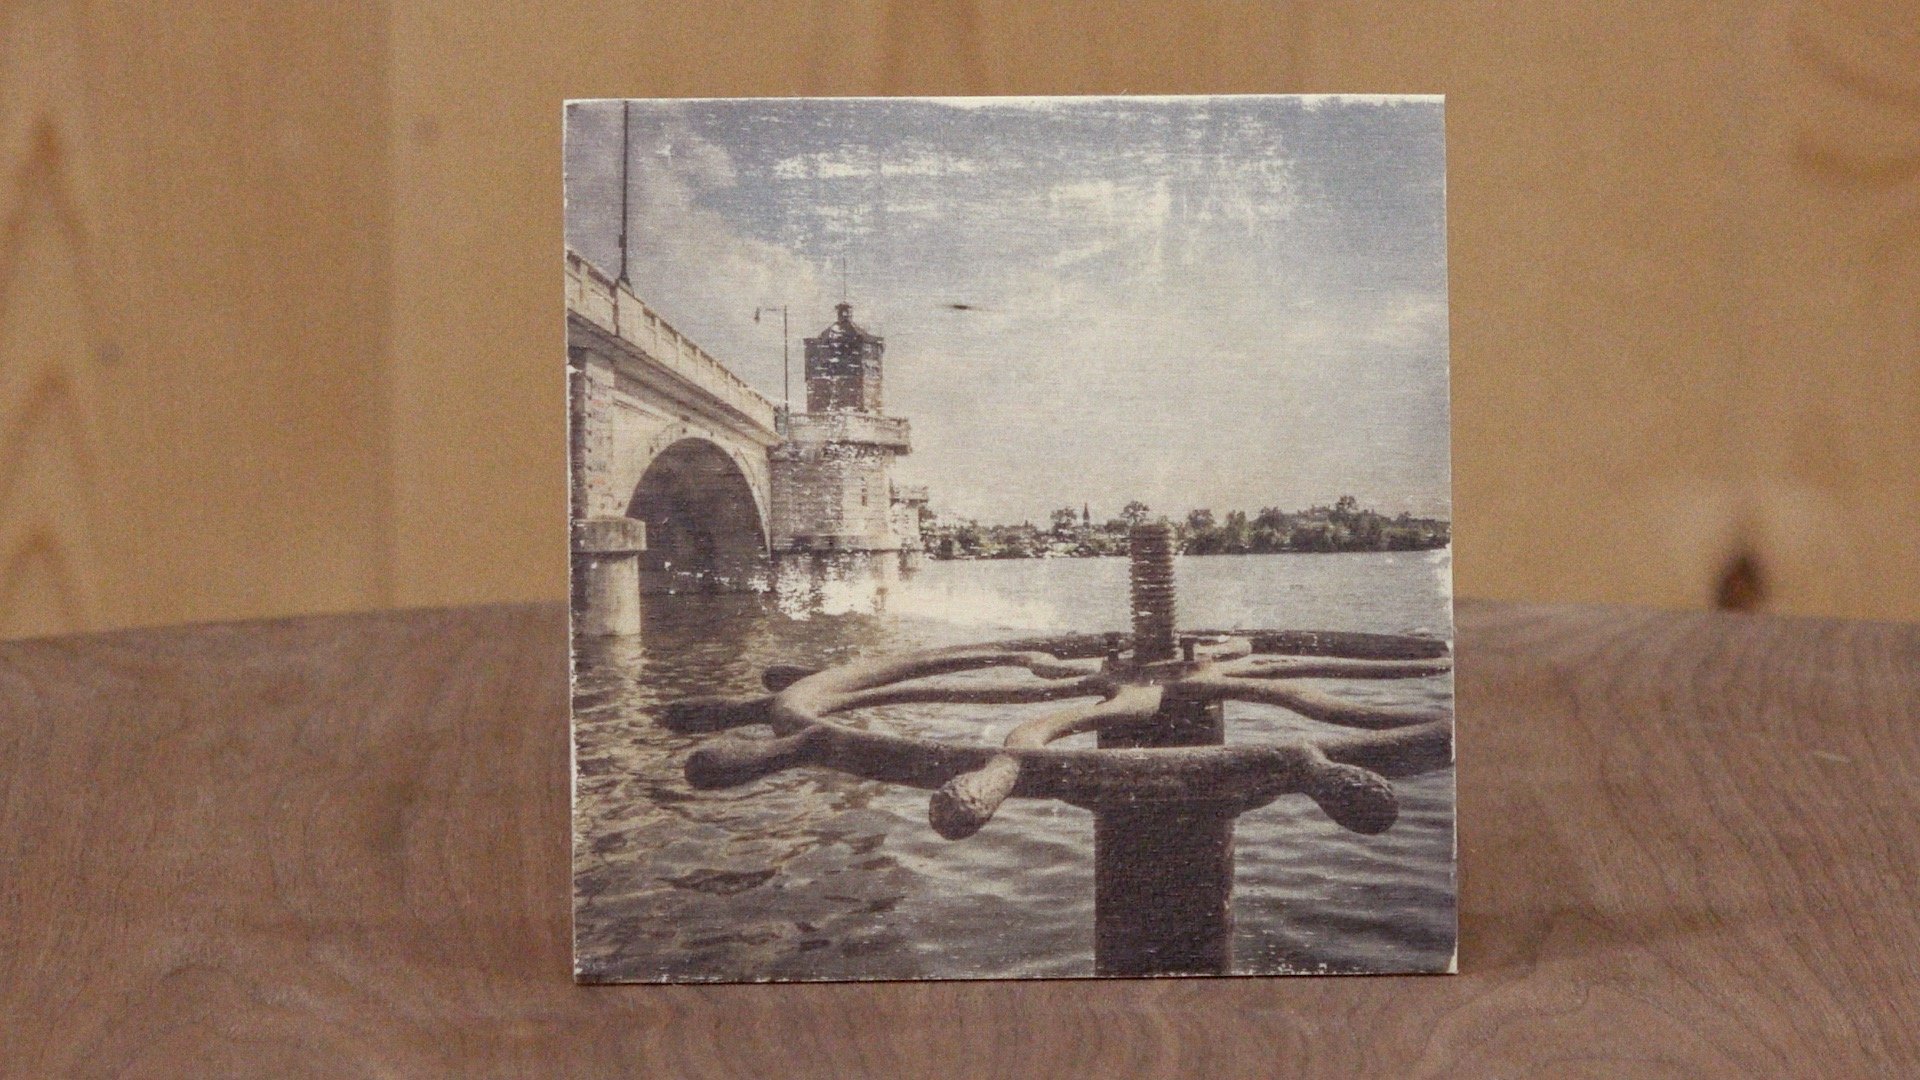
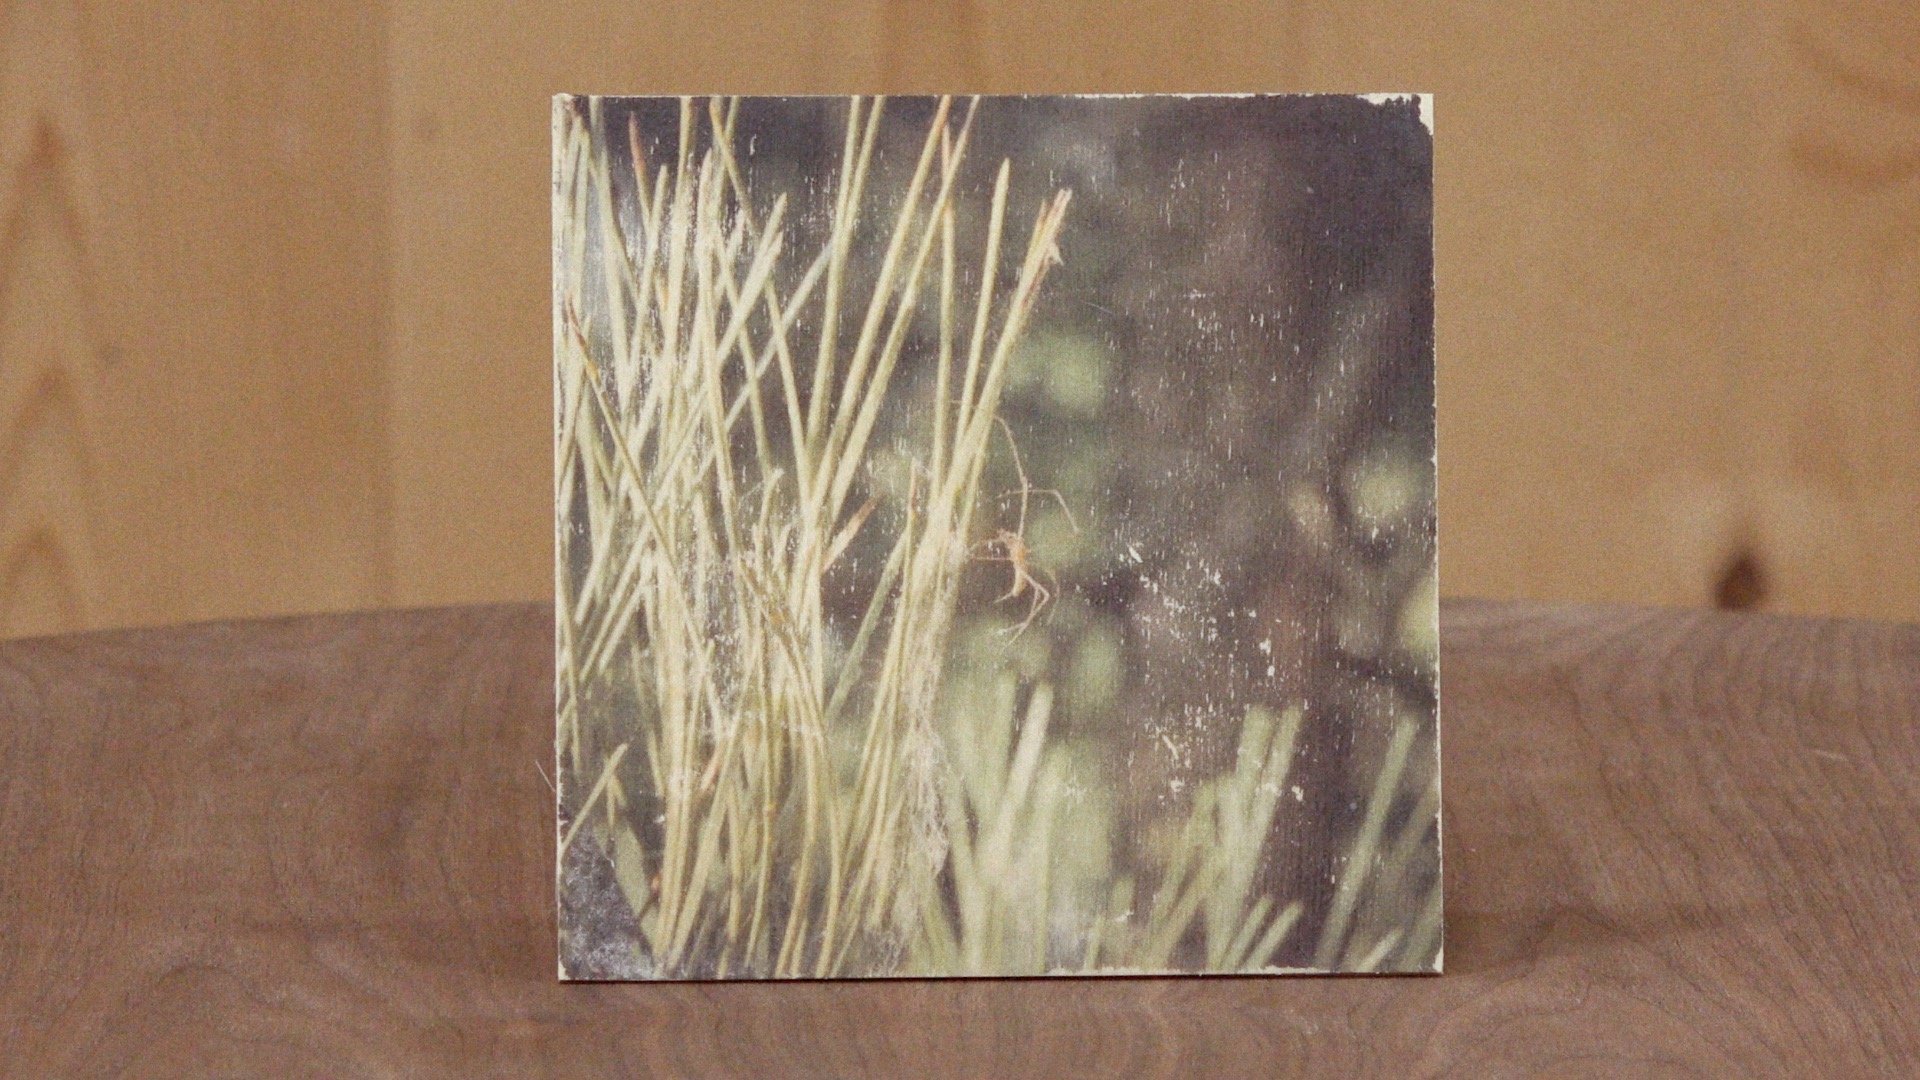
How to Transfer a Photo to Wood
This is an easy way to add some style and texture to your photos!
Image Transfer to Wood
This is an easy way to add some style and texture to your photos. Using this photo transfer technique there will be some loss of quality and some photos will work better than others. You’ll want to choose images with high contrast (dark areas and light areas). Any photographs with lots of detail or made up of mostly mid-tones may not work. The final product will have a vintage look and feel, almost like an old postcard. I chose some clean baltic birch plywood without much noticeable grain pattern so the focus would be on the photos. This is one of those art projects I’ll be experimenting with more and trying to come up with creative pieces using this simple technique. Let me know in the comments down below if you have any cool techniques you’d like to see me try!
Tools and Supplies Used


Laser Cutting Cardboard to Make a Human Skull
A fun project making 3D cardboard sculptures using a laser cutter.
A fun project making 3D cardboard sculptures using my Full Spectrum Laser cutter. I downloaded a free model of a human skull from Autodesk 123D. I then imported that model into 123D Make which lets you turn 3D models into 2D build plans and gives you step by step assembly instructions. Once you import your model you set the output size and the thickness of your material. The software quickly calculates how many sheets and parts you need based on your specs. I then used the outputted PDF to cut the cardboard sheets on my Full Spectrum Laser cutter. The Cardboard pieces were glued together using a bookbinding PVA glue which set quick allowing me to quickly move through the layers. I finished off the physical model using an air drying modeling clay. In a future video I plan on aging the skull to make it look old. If you have any suggestions on how to age it, let me know in the comments down below.
Tools and Materials Used


How to Make Masquerade Mask with a Laser Cutter
Designing and cutting a fox masquerade mask with Adobe Illustrator and a laser cutter.
This week on Make Something we’re going to make this fox masquerade mask out of veneers using a laser cutter. This mask will be made with several layers of veneer. We’ll start off with a layer of walnut topped with a layer of maple, just to give it some thickness and strength. Then I’ll add a layer of offset walnut to give the edges a border and top it off with some maple accent pieces. When I glue them together I’ll use a curved form so when it dries the mask will wrap around the face giving it a bit more dimension. This was a quick fun project. If you don’t have a laser cutter check your local library, art museum or maker space. Here in Toledo, Ohio we don’t have a maker space but our library does offer public access to their laser cutter and gives classes on how to use them. And you don’t even need a laser engraver or cutter to make this. You could do this by hand with an X-acto knife.
Products Used in This Video


Super Simple Way on How to Make Paper
How to make homemade paper from recycled materials you can find around the house.
I show you how to make homemade paper from recycled materials you can find around the house. For this easy craft project you will need a paper making deckle (link below), blender, tub of water, sponge, window screen, bath towel, paper towels, an iron and a heat gun. This is a fun craft project that anybody can do. I use my homemade paper to print my photographs on for framing. This adds and extra element of uniqueness to my art.
Links and Products Used


How to Make a 3D Layered Photograph with ArtResin Epoxy
How to make a 3D layered photo using epoxy.
I to show you how to make this 3D layered photograph of my dog. It involves taking 1 image, cutting out the background and making a print from that and another print from the foreground image. In this example I’m making the frame from scratch but you could easily take an existing frame and do this as long as the depth is over 1/2”. That will allow a reservoir for all the epoxy we’re about to use.
I’m using a new product call Art Resin and I’m loving it. Unlike most 2-part epoxies, Art Resin is free of VOCs has no fumes and safe. It’s super clear and easy to use. This is now my go-to for all my kitchen based woodworking projects.
Products Used

Woodworking Books

Make Your Own Cutting Boards
15 cutting board projects to make as gifts or sell! Get your signed copy!

The New Bandsaw Box Book
8 bandsaw box projects you can make and sell at craft shows. Signed copies now available!